Hello! In this post, we will see the process of integration WhatsApp in Saral Accounts.
WhatsApp is a messaging application that can be used for messaging, sharing images, videos, documents & Locations.
Saral Accounts in its new release of v13.08 has provided the feature of sharing reports generated in Saral, through WhatsApp. The report will be shared in PDF format to the WhatsApp of the respective party number, on click of a button.
The report will be shared automatically to the mobile number entered in the ledger master of the party.
Benefits of WhatsApp sharing in Saral Billing and Accounts
- Very easy method of sharing Invoices/Reports to Customers/Suppliers
- Effective and time-saving
- Automated message with a PDF attachment will be shared
- No additional charges
Let us now see the process of Configuring WhatsApp in Saral Accounts
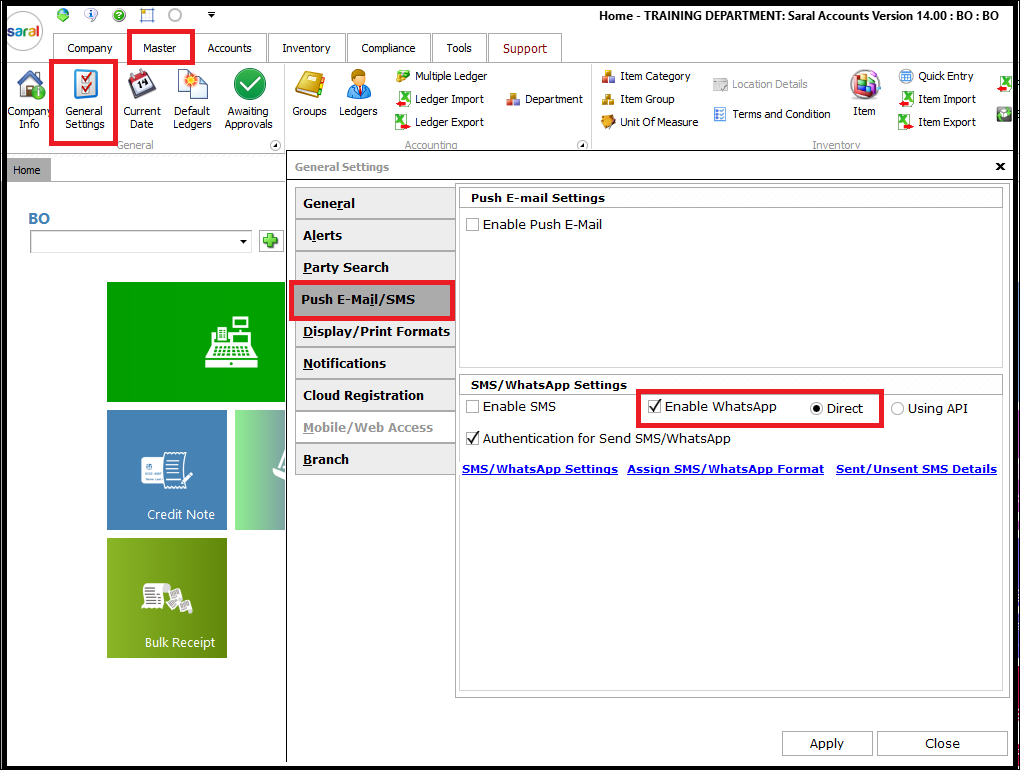
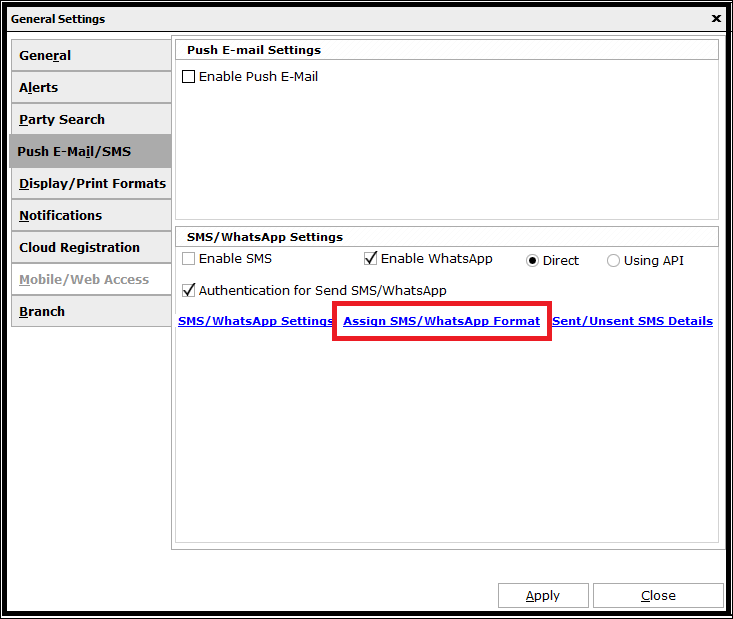
Go to Push E-Mail/SMS tab under General Settings of Master module. Here, click Enable WhatsApp and select the Direct option.
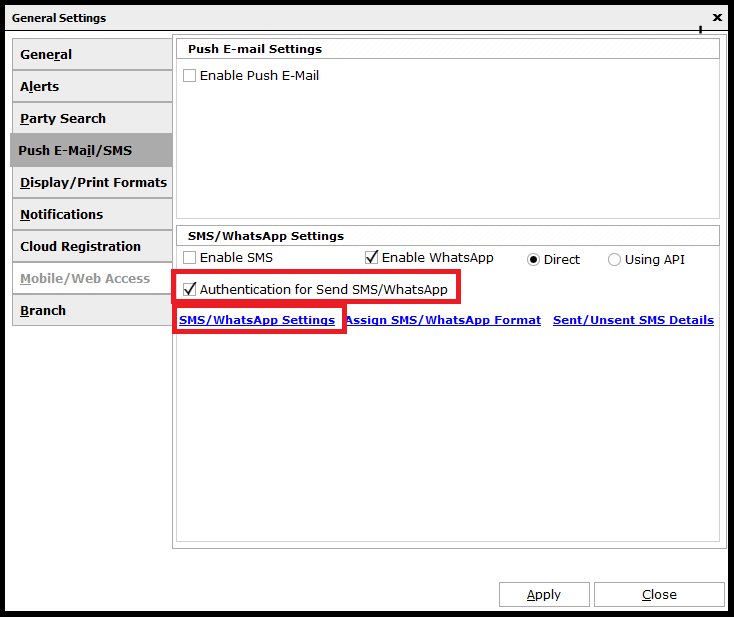
Now, enable Authentication for Send SMS/WhatsApp to authenticate before auto sending the message and attachment. Then, click on SMS/WhatsApp Settings.
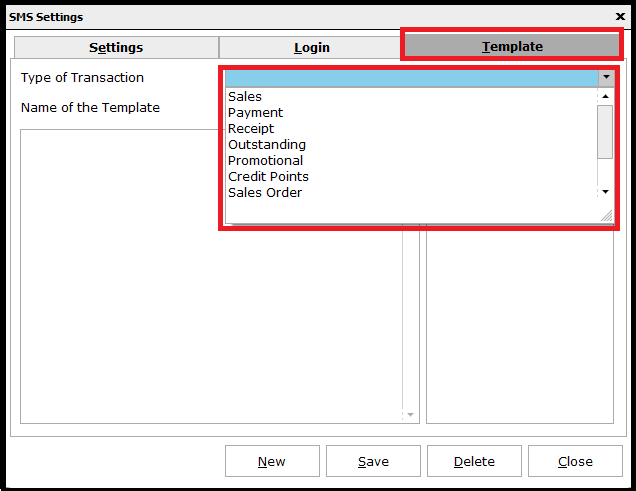
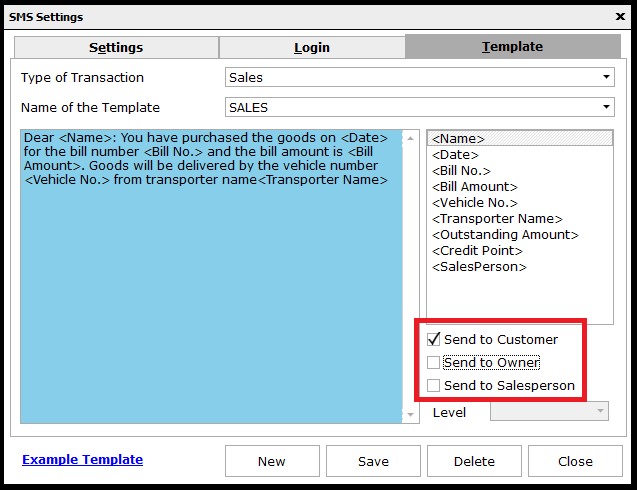
Go to the Template tab and select the required type under Type of Transaction to send PDF Attachment through WhatsApp on completion of the transaction.
Enter a name for the template under Name of the Template and click on Example Template. Close the window and the example message will be auto copied. This message content can be edited as required. The message can be formed using the value tags made available at the right side. Drag and drop these tags to form the message.
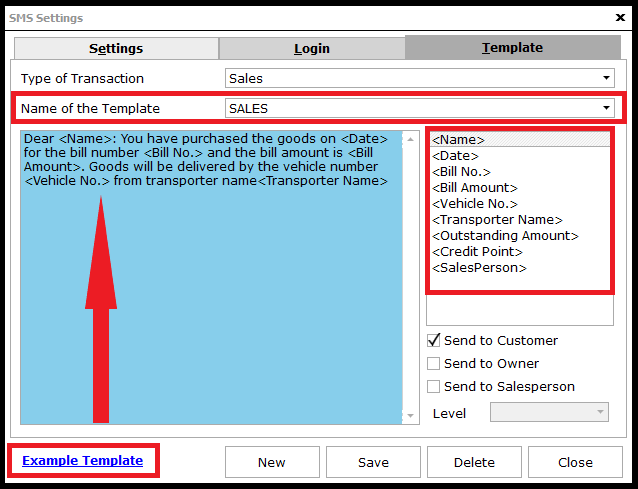
Now, select Send to Customer/Send to Owner/Send to Sales person as required. After entering all the details, save and exit.
In the main window of General Settings, click on Assign SMS/WhatsApp Format.
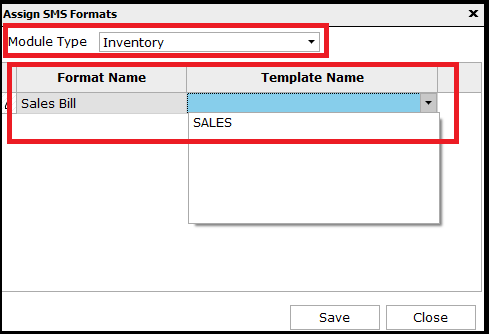
Here, select the required module under Module Type. All the transactions available under the selected module will be listed. Select the WhatsApp template name for each of the format. Save and exit the settings.
Apply the settings at the main window and exit.
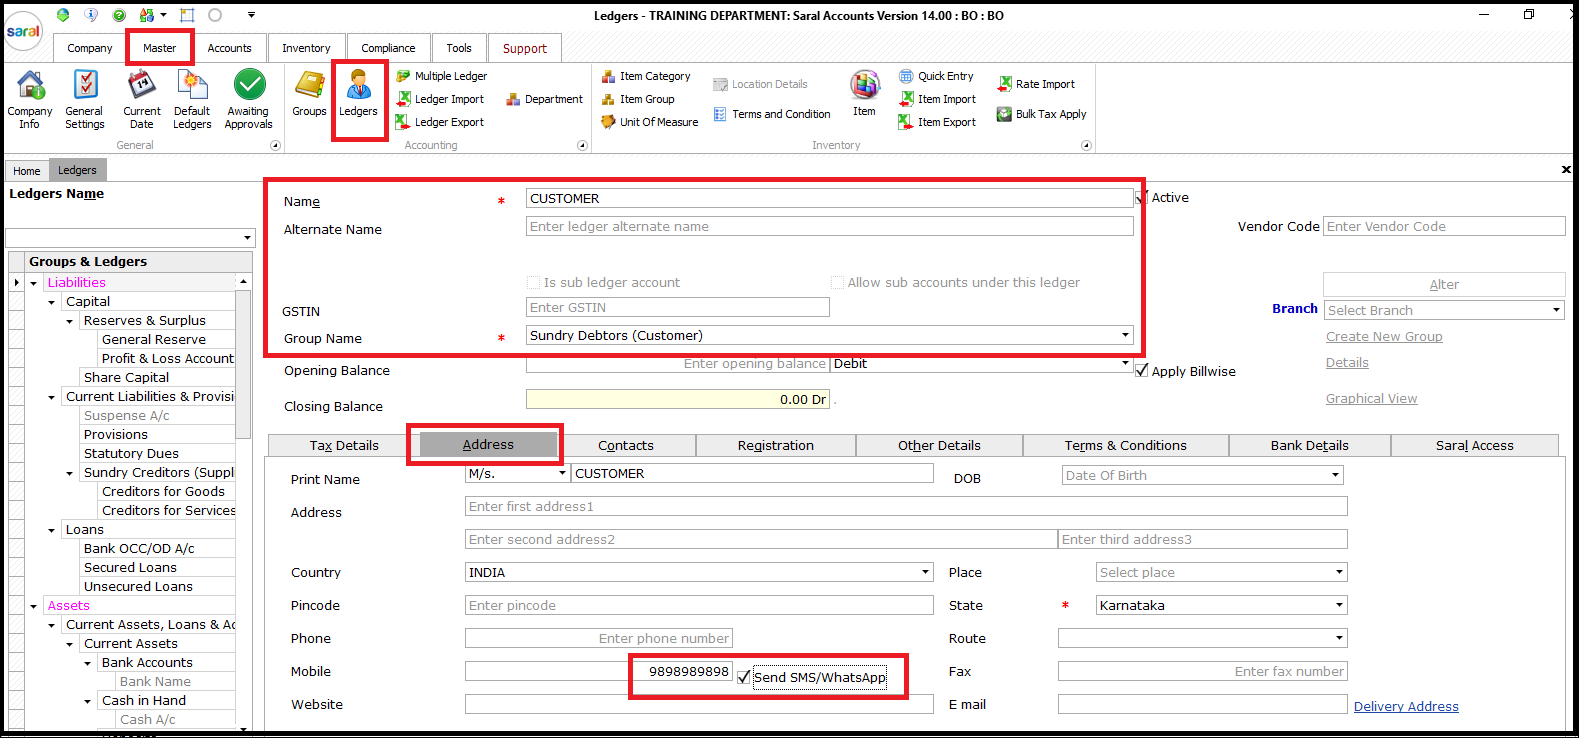
Lastly, go to Ledger under Master, select existing customer/supplier ledger or create a new ledger. Click on the Address tab, enter the Mobile number, and enable Send SMS/WhatsApp. Save and exit the settings.
Now we will see this process in working
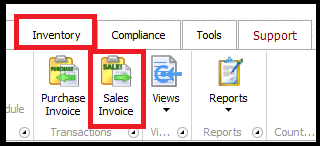
Open the transaction for which WhatsApp messaging is enabled. We will assume the Sales Invoice here. Go to Inventory and click on Sales Invoice.
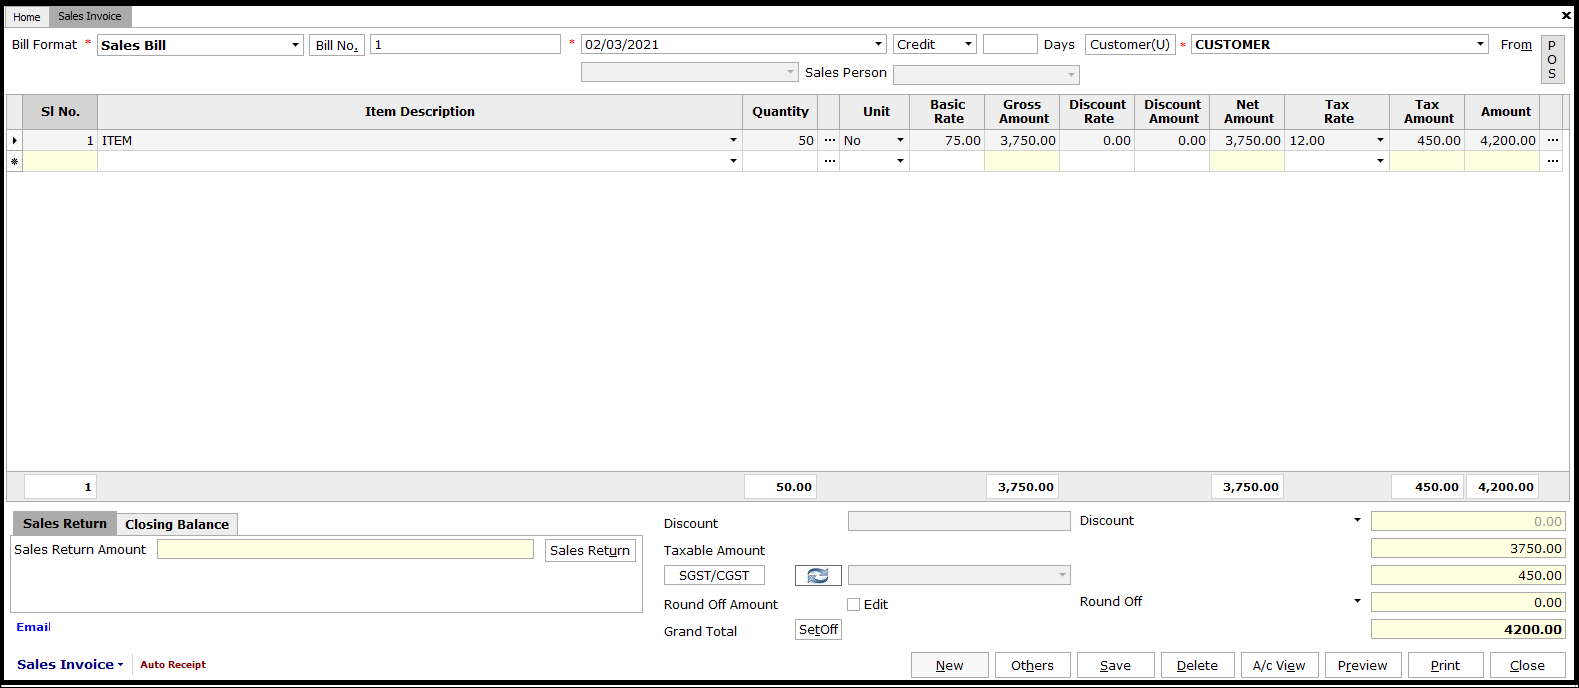
Select Customer from the dropdown. To create a new ledger or edit an existing ledger, press the F9 key. Make sure to verify that Mobile Number is entered and Send SMS/WhatsApp option is enabled for the ledger.

Next, select the item and enter quantity, rate, and other related details. After entering all the details, click on save and the sales invoice will be saved.
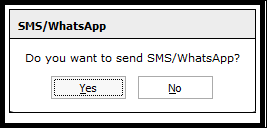
On save, we will get an authentication message “Do you want to send WhatsApp?” Click on Yes to send the invoice and No to return to the Sales Invoice window.
Once we click on Yes, immediately a browser will open, and the WhatsApp Web login QR Code screen will be displayed.
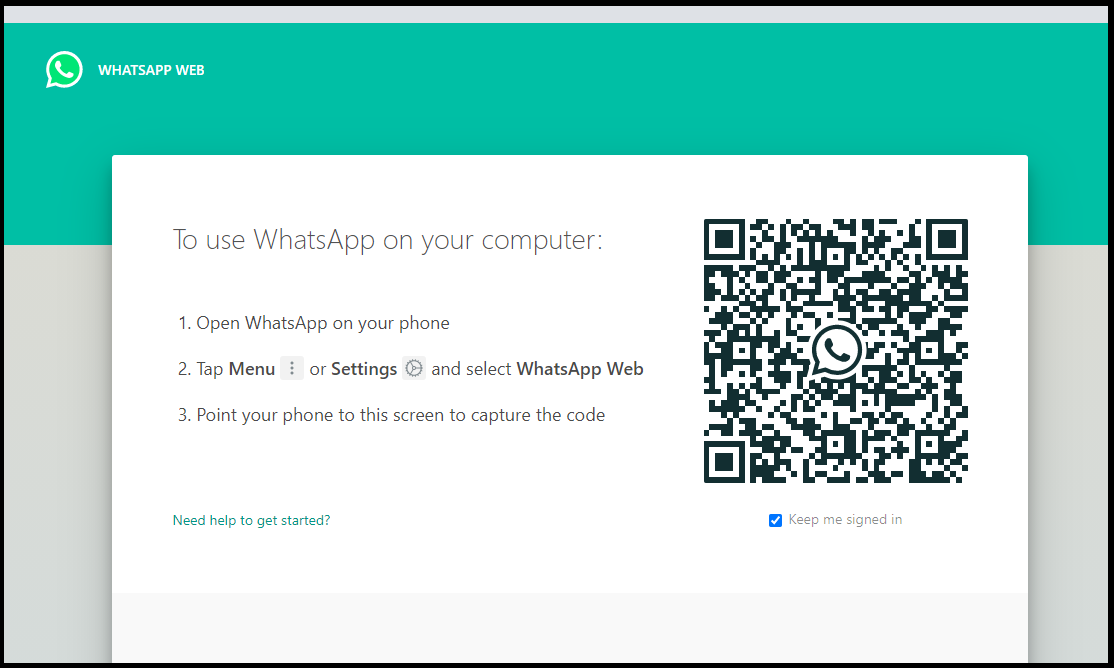
We need to scan the QR Code through the WhatsApp App in our Mobile/Tab. Scan the QR Code and login into your WhatsApp. On login, an auto Message will be sent through Saral to the respective customer.
The Sales Invoice will be sent as a PDF attachment.
Note: WhatsApp should always be in logged in status in Mobile/Tab until we use WhatsApp through the web.
The reports sent can be seen through the WhatsApp Application.
This completes the process of integrating WhatsApp in Saral Accounts.


