Hello everyone. In this post, we will see how to do E-invoicing in Saral Accounts and Billing Software.
Latest Update
In a recent interview with PTI, Finance Secretary Mr.Ajay Bhushan Pandey said that e-invoice would be mandatory from April 1st, 2021 for all the B2B transactions by businesses with a turnover of over Rs. 5 crores.
Before enabling E-Invoicing, we have to make sure to have provided the below details:
- Software is licensed for the “Saral Account – Diamond with E-Invoice” version of SARAL
- E-Invoice is enabled and login is registered at the GSTN portal
- API Integration registration is done at the E-Invoice Portal. To know more view API registration click here.
- In SARAL,
- Company Details are entered in full i.e. Company address with Pincode, Contact details and GSTIN information are all made available.
- All items/services are updated with their HSN/SAC code
- Login credentials for the E-Invoice portal are entered
You can watch the video or read below the step by step the process for e-invoicing in SARAL.
First, we will see the process of updating the prerequisite information.
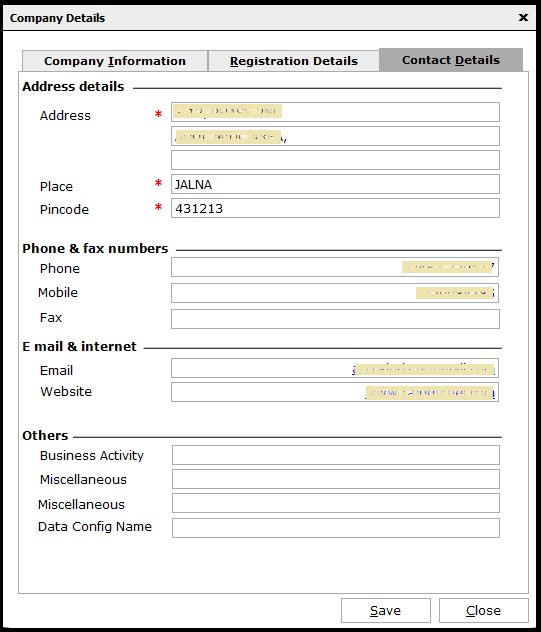
To update company details, go to Company Info under the Master module and update the required details, if not updated.
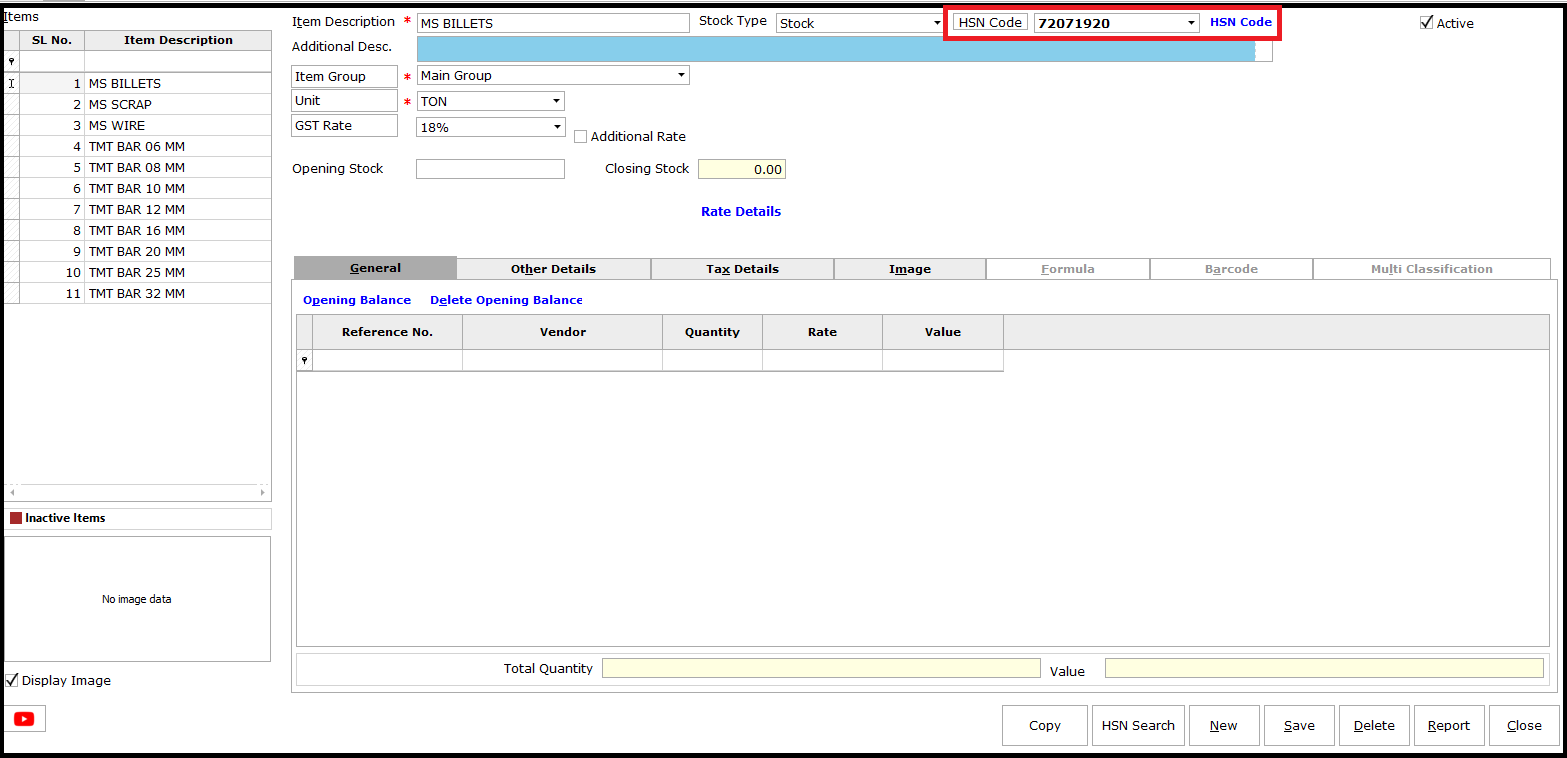
Next, update HSN/SAC for all items/services if not done. To update, go to Item under the Master module and select the item and select the applicable HSN code.
If a bulk update of HSN code is required to be done, go to Bulk Tax Apply under the Master module, select the items to be updated under a single HSN code, select the HSN code, and update.
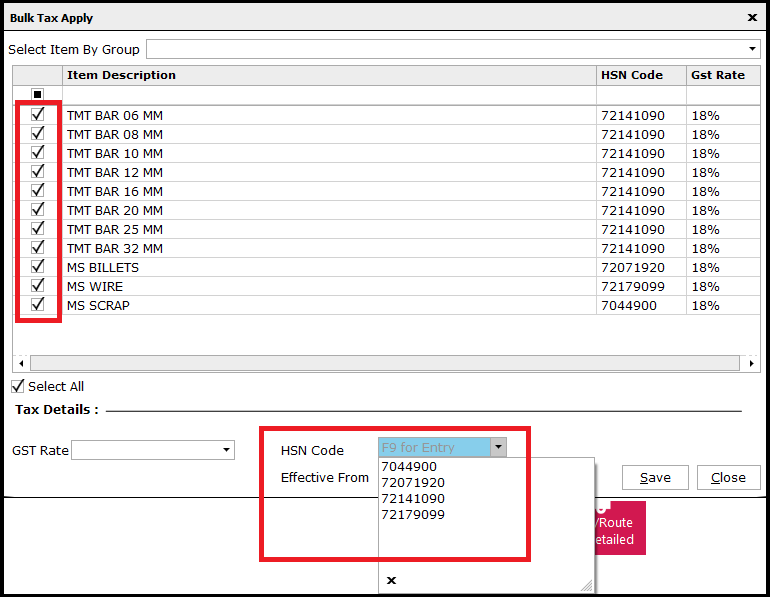
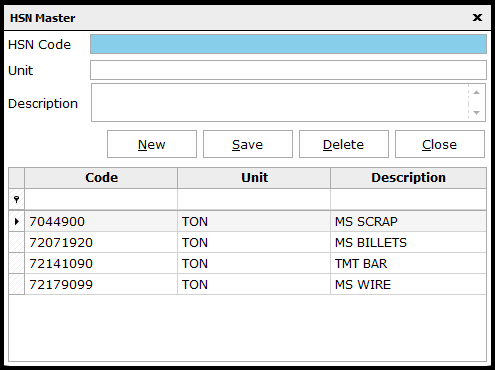
If the required HSN code is not available, then press F9 and add the HSN code in the HSN Code master.
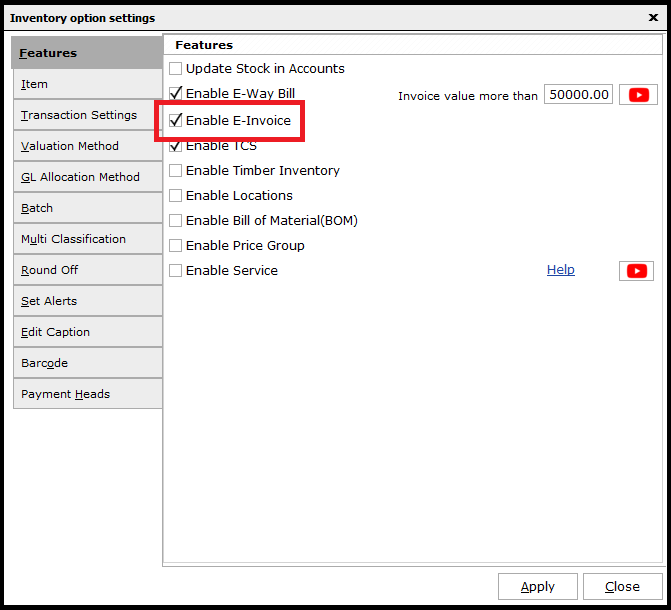
Now, go to Inventory Settings under the Inventory module and check Enable E-Invoice for the E-invoice process to be enabled.
Note: In case any mandatory fields are not updated as explained before, the same will be highlighted. Update the required and continue.
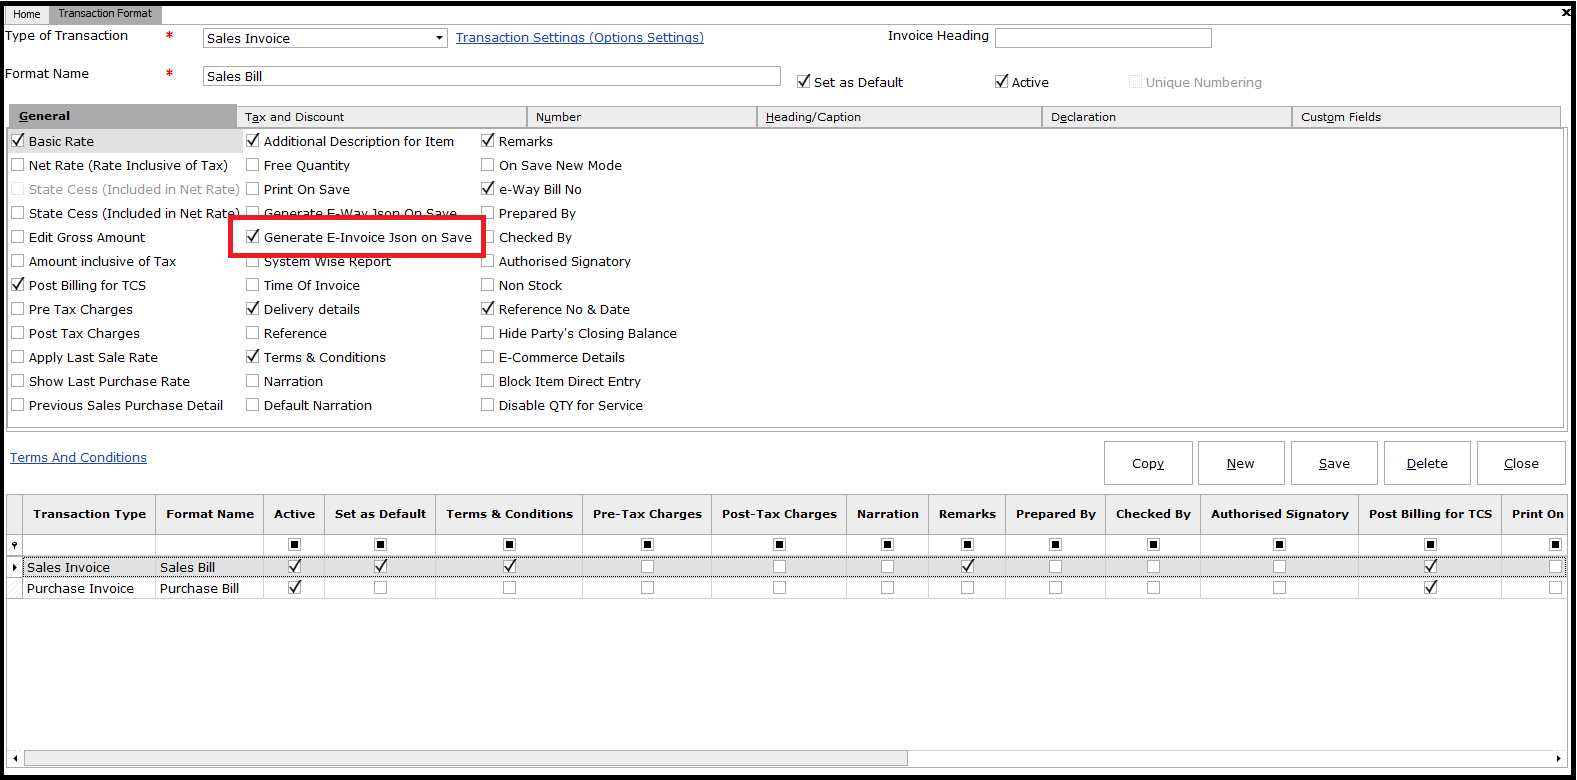
Then, go to Transaction Formats under the Inventory module and select the Sales Invoice format. In the General tab of the format, enable the option to Generate E-Invoice Json on Save. Save the format and exit.
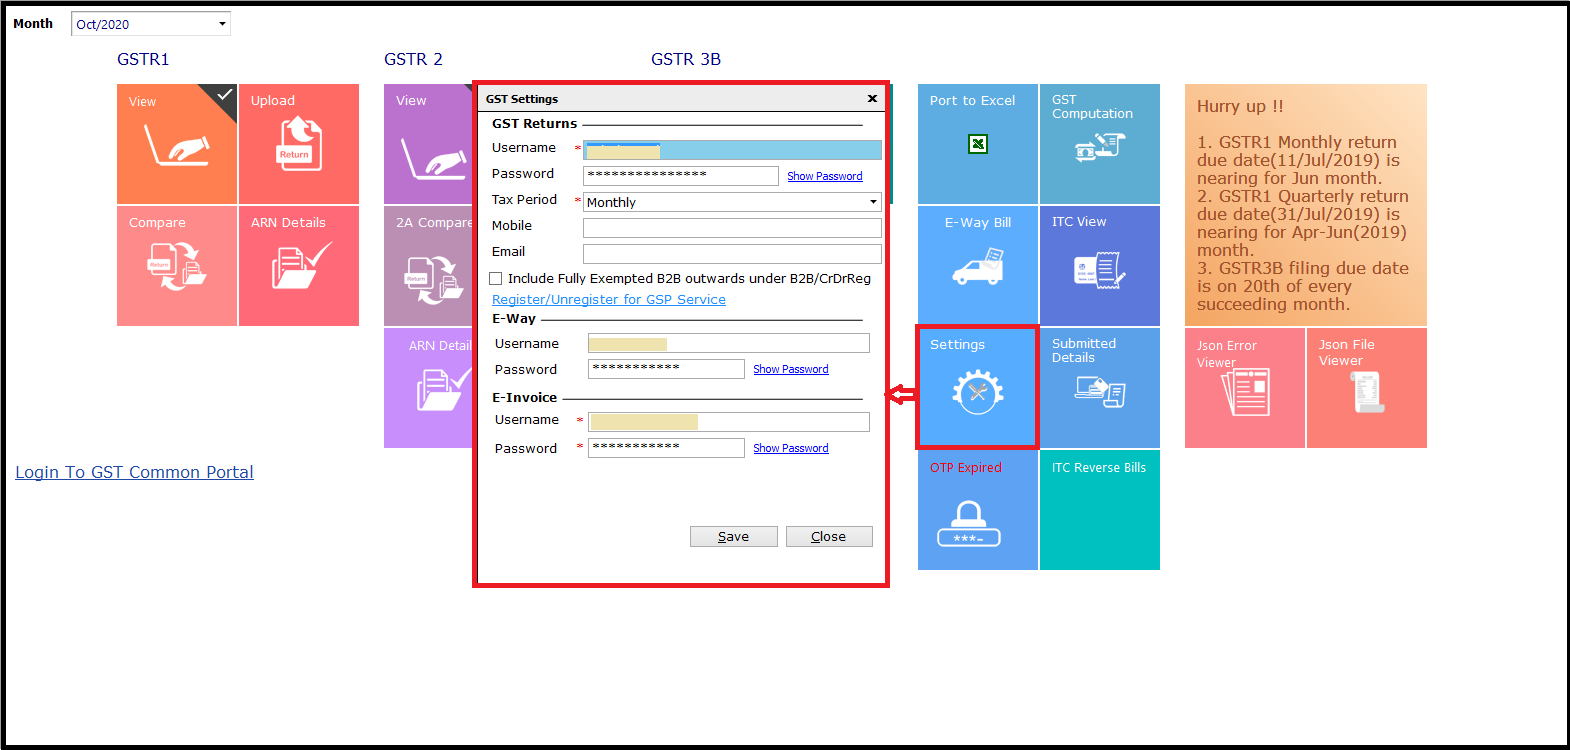
Next, go to GST Returns under the Compliance Module. In the GST Return Home Screen, click on Settings and enter the E-Invoice API Login Credentials.
Now, we are ready for the generation of E-Invoice.
Go to Sales Invoice and prepare an Invoice.
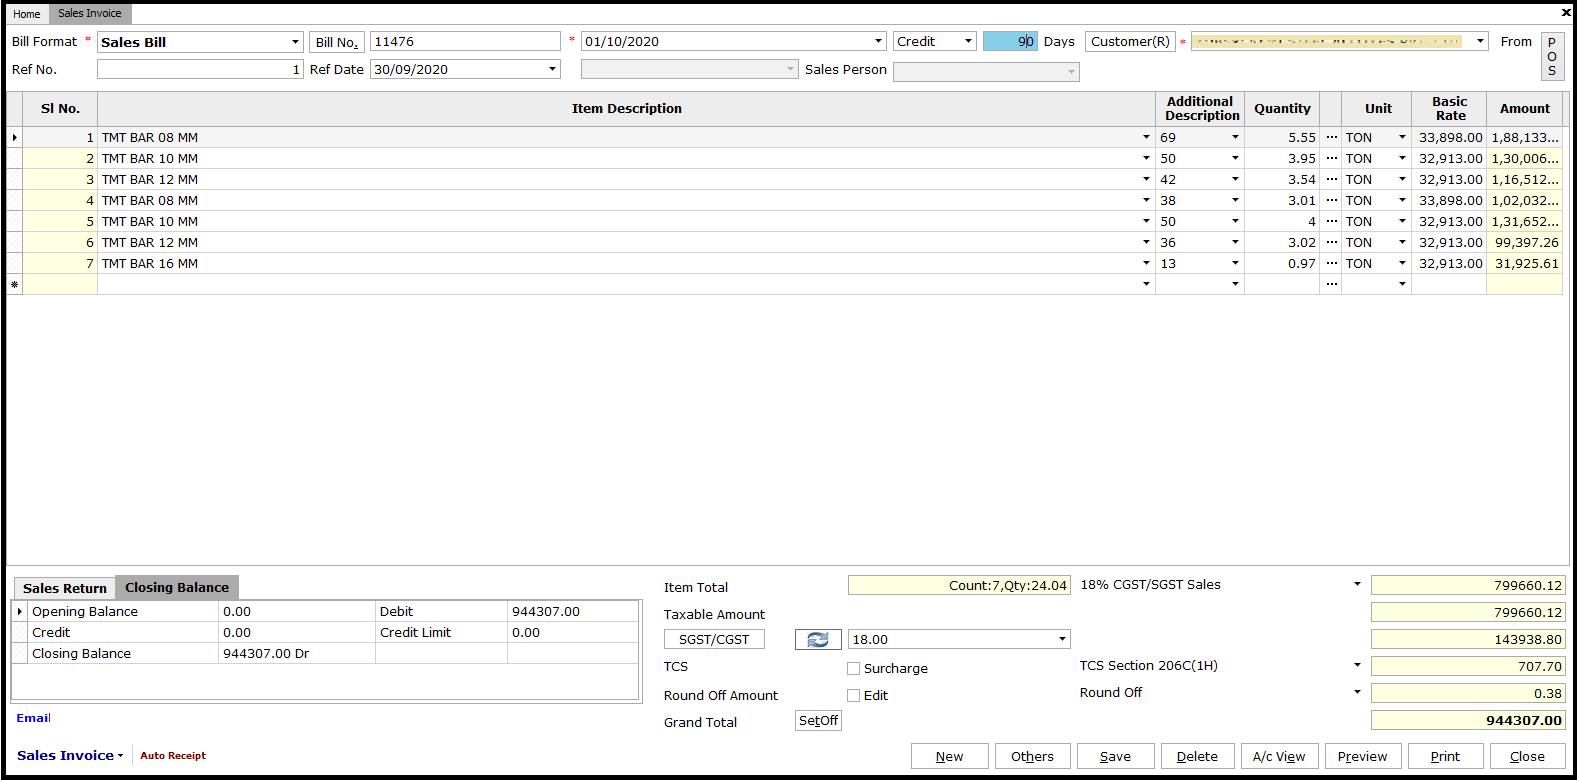
Note: Make sure that the Customer ledger is also updated with their complete address with Pincode, contact details, and GSTIN.
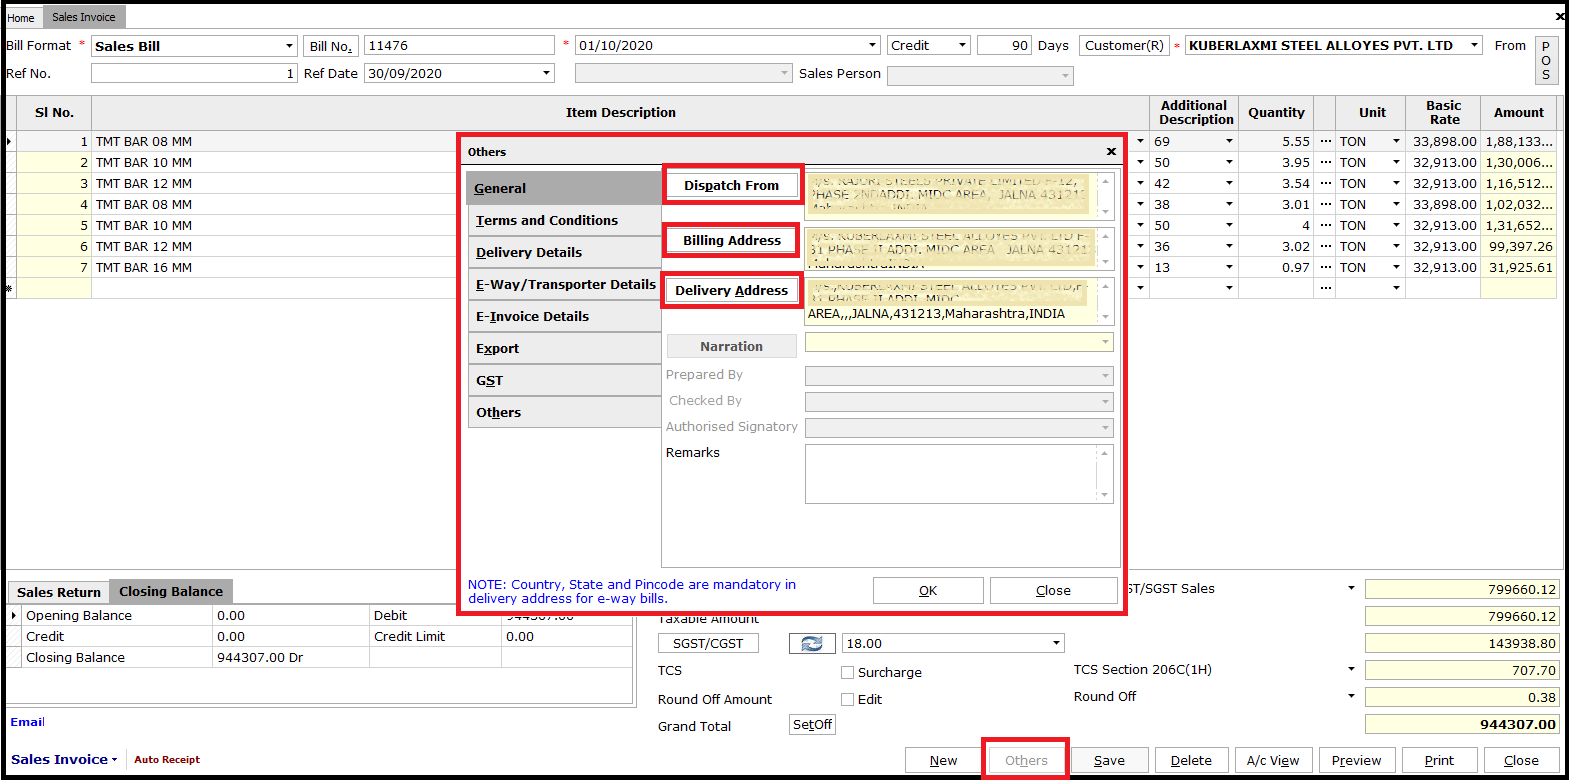
After entering all the invoice details, click on Others. Under the General tab, select the required Dispatch From address, Billing Address, and Delivery Address. Make sure that all these entries are updated with the proper address with Pincode and contact details.
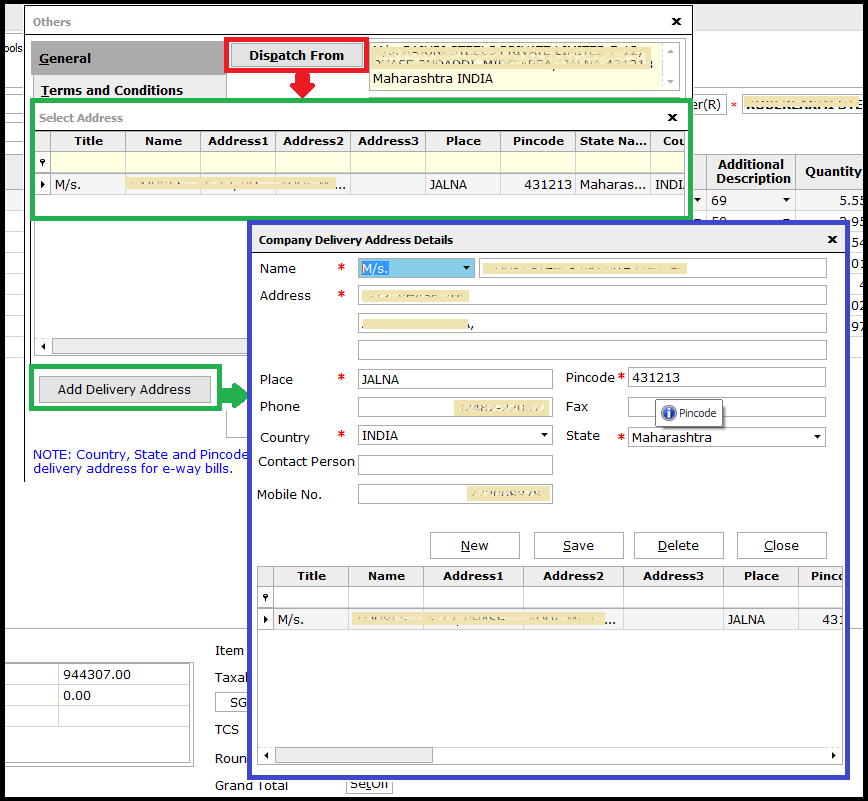
To add a new address, click on Add Address in the respective windows.
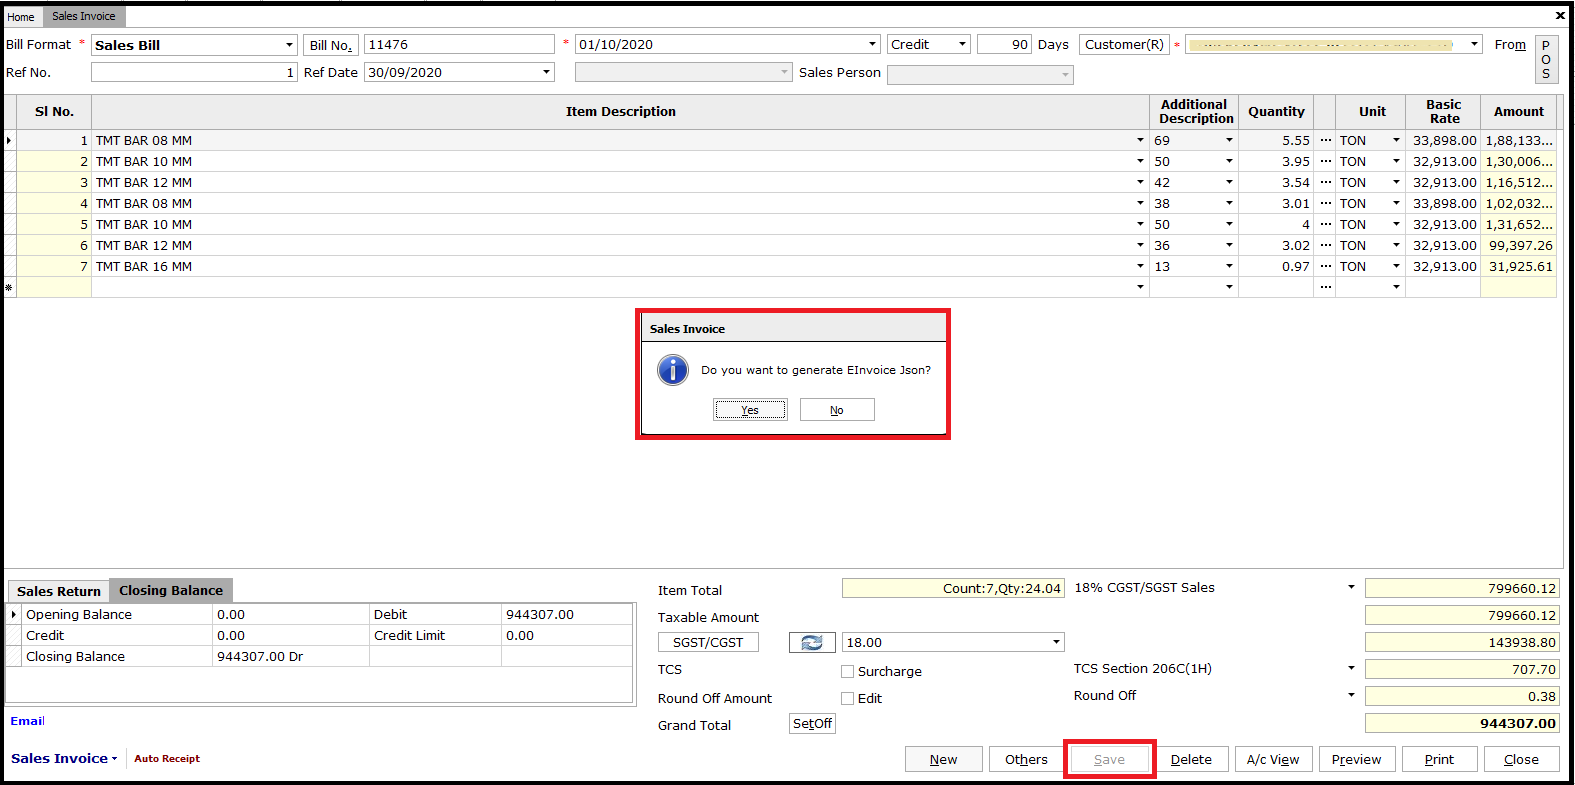
After updating all the details, click on Save. You will be asked if you want to create an E-Invoice Json. Click on Yes, to create the Json file.
After the creation of Json file, you will be asked if the same has to be uploaded. Click on Yes and the Json file will be uploaded to the website. The success message will be displayed after the successful upload of details to the IRP portal.
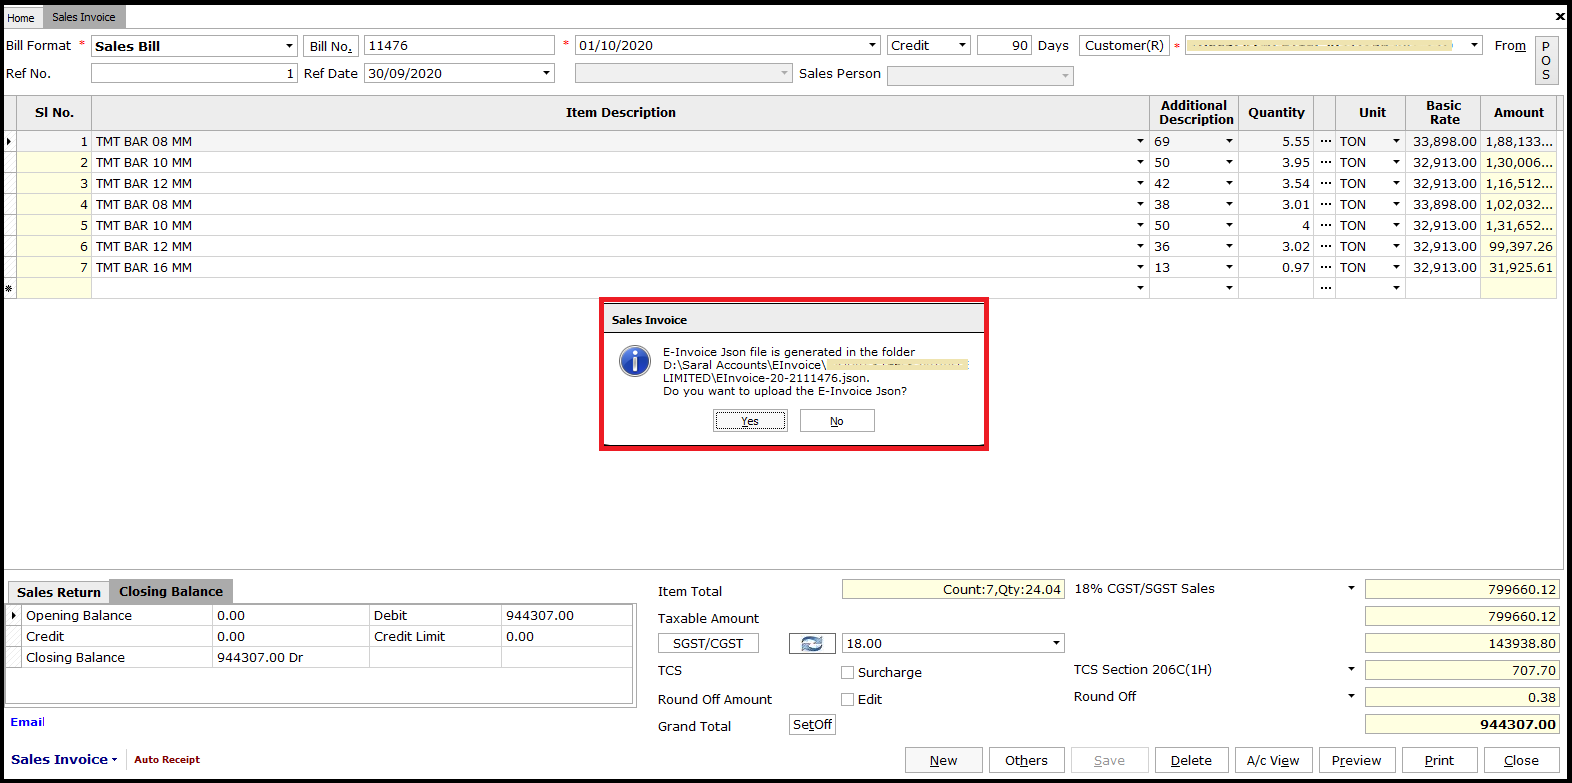
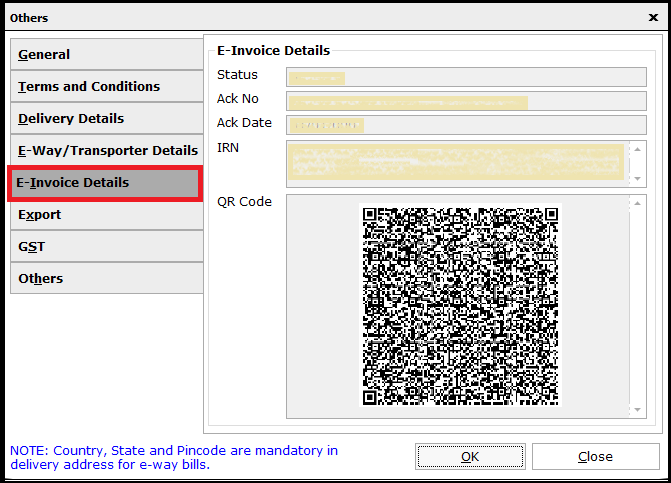
After upload, to view the IRN details related to the Invoice, open the invoice, click on Others, and select on E-Invoice Details. Here the IRN along with other details will be displayed.
To print the invoice, click on Preview and do the required settings.
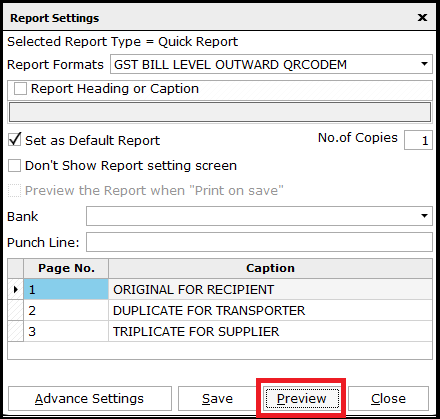
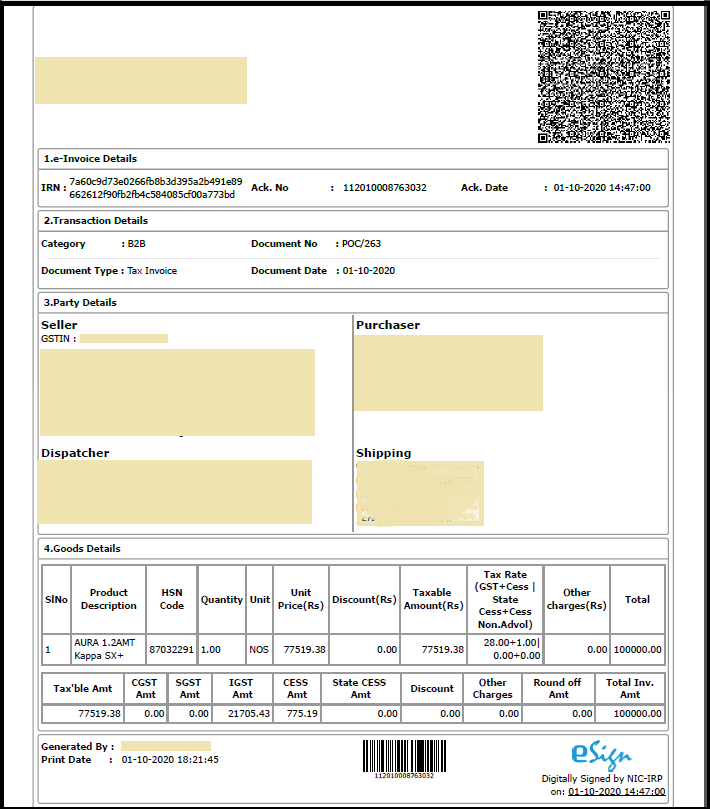
Now, click on Preview and the E-Invoice with QR code in PDF will be displayed.
To view or upload the invoices in bulk, go to E-Invoice under the Inventory module, and select the date range.

All the invoices for the selected date will be displayed. If any invoices are pending for upload, select the view type as Pending and the related invoices will be displayed.

Select these invoices and click on Create Json. The Json file for all the invoices will be created. Now, click on Upload and all the invoices will be uploaded to IRP.
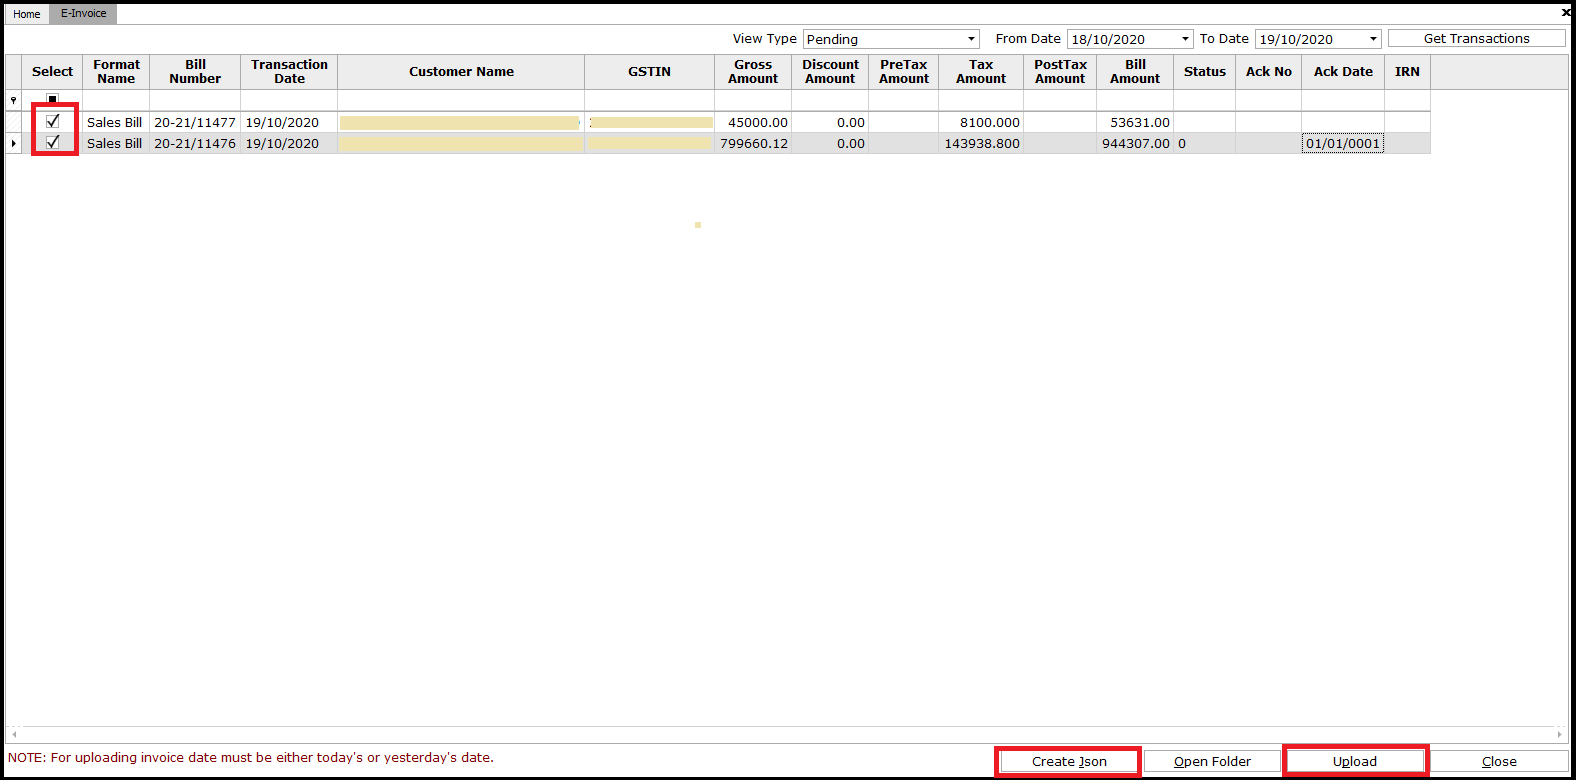
To view the details of all the invoices uploaded along with their acknowledgment details select the view type as Uploaded.
You can also learn about E-invoicing in general:
This completes the process of E-Invoice generation in SARAL.


