[vc_section][vc_row][vc_column][vc_column_text]Hello, in this post and the upcoming posts, we will see the Data Synchronization process between the branches in Saral Accounts and billing software.
Data synchronization is a process where the data is transmitted over the internet between two or more branches to make a single database and access the details in whole.
In accounting software, the process is to sync the details between the head office and the branch office of the business in real-time and get a single accounting system.
The process in Saral is divided as below:
- Configuration at Head office
- Configuration at the Branch office
- Data Synchronization at real-time
Before starting the process, make sure that the Branch details are created in the software which can be viewed in our Branch Creation tutorial.
Let us now see the process one-by-one:
In this post, the process of Configuration at Head office will be explained.
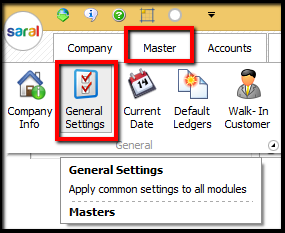
The configuration at the Head office starts will with registering the file for Data Exchange. To register for Data Exchange, go to General Settings under Master Module.
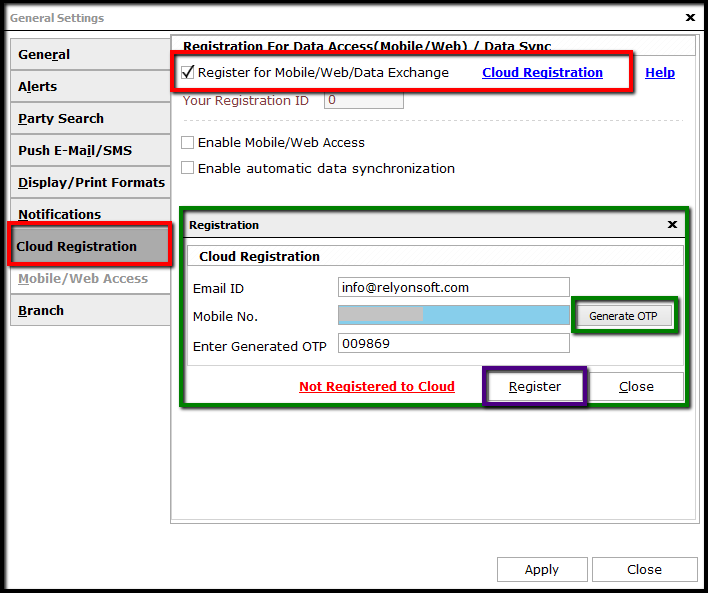
In the General Settings screen, select Cloud Registration tab and enable the option Register for Mobile/Web/Data Exchange. Next, click on Cloud Registration hyperlink. In the registration window, provide the mail id and mobile number used for registration and click on Generate OTP. The OTP will be received on the mail id and mobile number entered. Enter the OTP and click on Register.
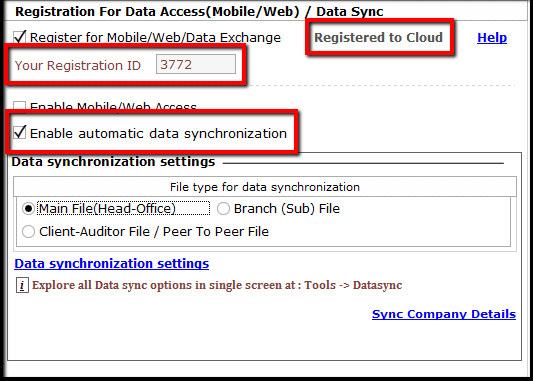
You will be registered for Data Exchange and your Registration id will be displayed. Next, enable the option to Enable automatic Data Synchronization and the Data Synchronization window will be displayed.
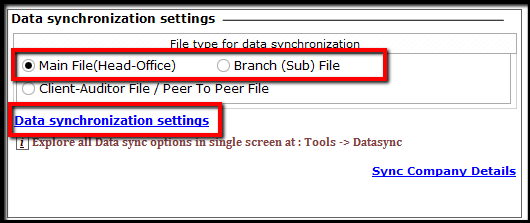
Here, select the type of file i.e. Head Office or Branch Office and click on Data Synchronization Settings hyperlink.
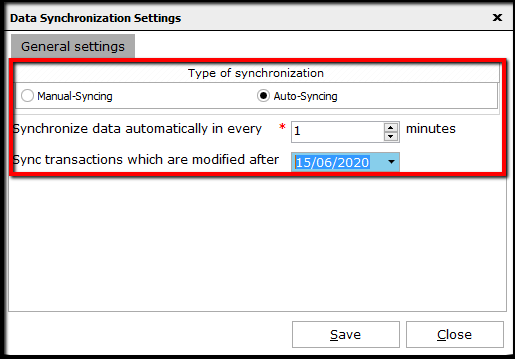
In the Data Synchronization window, select the required type of synchronization i.e. Manual-Syncing if the data will be synced manually and Auto-Syncing for an automated process.
In the case of Auto-Syncing, select the duration for sync i.e. 1 if the data has to be synced every 1 minute. Also, if the data has to be synced after a particular date, then enter the date and save the settings.
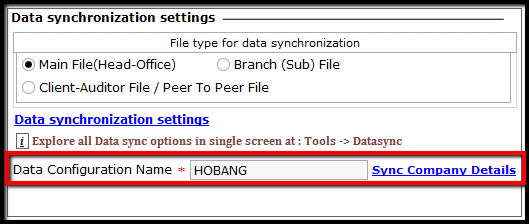
The Data Configuration Name will be auto taken from the Branch Master. Click on Sync Company Details hyperlink to sync all the details to online.
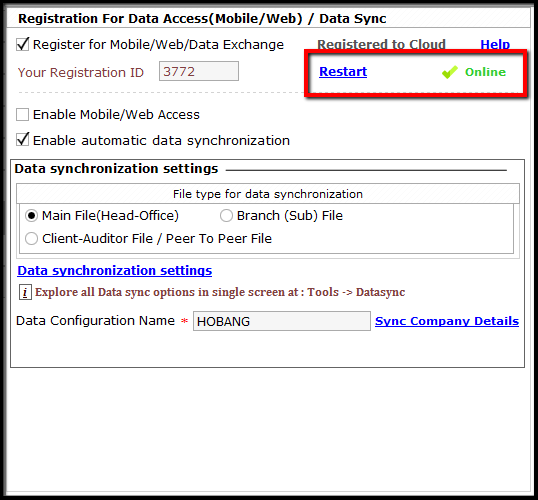
On successful synchronization, you can see that the status is shown as Online. In case the sync is not successful, click on Restart.
Now, click on Apply and all the settings done will be made applicable for the company file.
This completes the process of Data Synchronization settings for Head office in Saral Accounts and Billing software.[/vc_column_text][/vc_column][/vc_row][/vc_section]
