[vc_section][vc_row][vc_column][vc_column_text]Hello, in this post, we will see Data Synchronization configuration from the branch office at Saral Accounts and billing software.
This is a continued post of the previous post on Data Synchronization configuration at Head Office & Branch Creation which can be viewed below;
Let us now see the process.
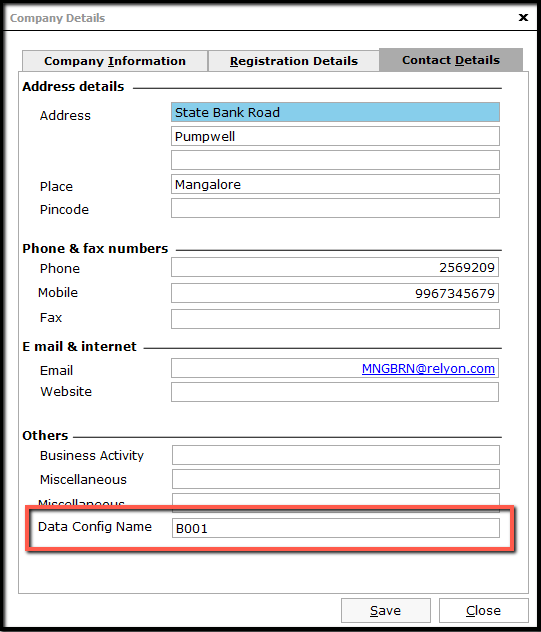
The configuration at the Branch office starts file creation and doing the required setting at the Company Master Window. Make sure enter the Data Config Name same as that given in Branch Master Window for the said branch.
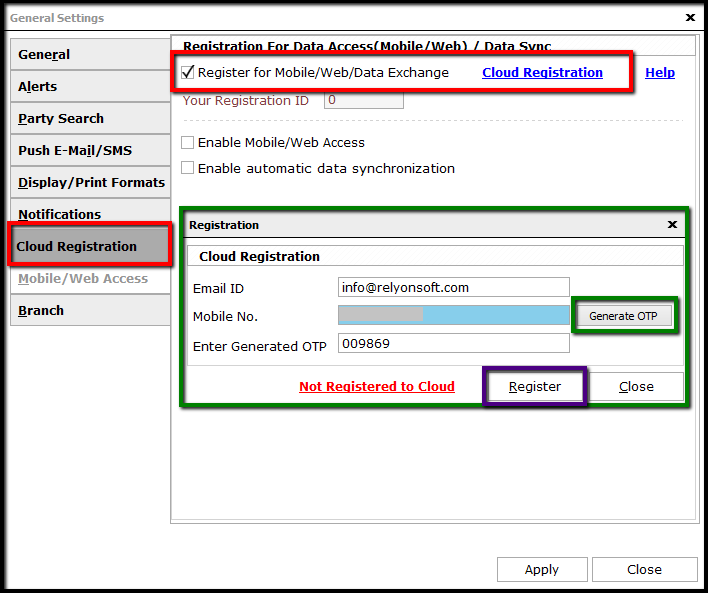
Next, register the file for Data Exchange. To register for Data Exchange, go to General Settings under Master Module.
In the General Settings screen, select Cloud Registration tab and enable the option Register for Mobile/Web/Data Exchange. Next, click on Cloud Registration hyperlink. In the registration window, provide the mail id and mobile number used for registration and click on Generate OTP. The OTP will be received on the mail id and mobile number entered. Enter the OTP and click on Register.
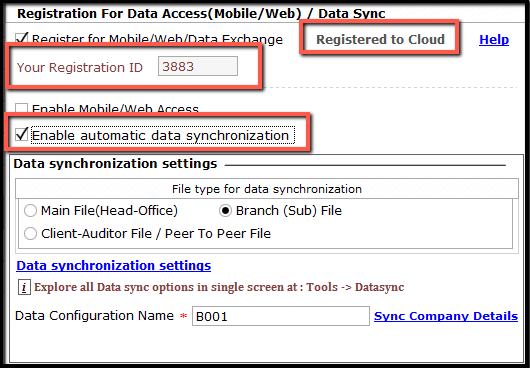
You will be registered for Data Exchange and your Registration id will be displayed. Next, enable the option to Enable automatic Data Synchronization and the Data Synchronization window will be displayed.
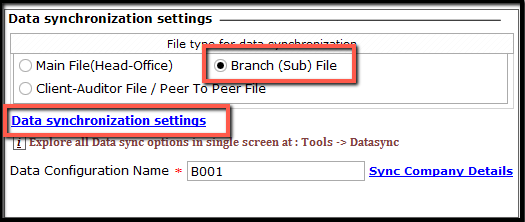
Here, select the type of file i.e. Branch Office and click on Data Synchronization Settings hyperlink.
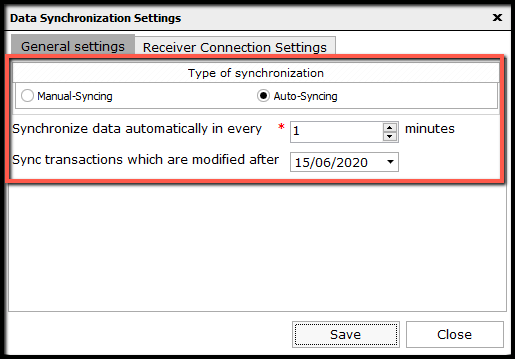
In the Data Synchronization window, under the General Settings tab, select the required type of synchronization i.e. Manual-Syncing if the data will be synced manually and Auto-Syncing for an automated process.
In the case of Auto-Syncing, select the duration for sync i.e. 1 if the data has to be synced every 1 minute. Also, if the data has to be synced after a particular date, then enter the date and save the settings.
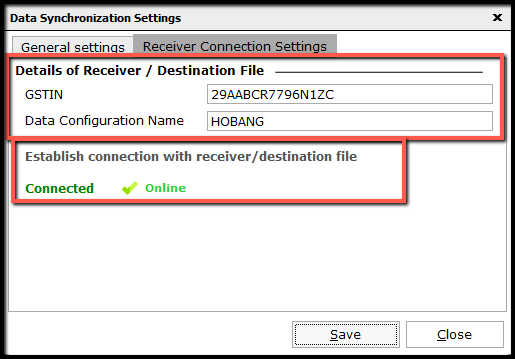
Under Receiver Connection Settings tab, enter the GSTIN and the Data Configuration Name of the Head Office file. After entering the details, click on Establish connection with receiver/destination file. This will connect the branch file to the HO file and the status will be shown as Connected. If the HO file is currently available then it will be displayed as Online. Save and continue.
The Data Configuration Name will be auto taken from the Company Master. Click on Sync Company Details hyperlink to sync all the details to online.

Now, click on Apply and all the settings done will be made applicable for the branch file.
This completes the process of Data Synchronization settings for the Branch office in Saral Accounts and Billing software.[/vc_column_text][/vc_column][/vc_row][/vc_section]
