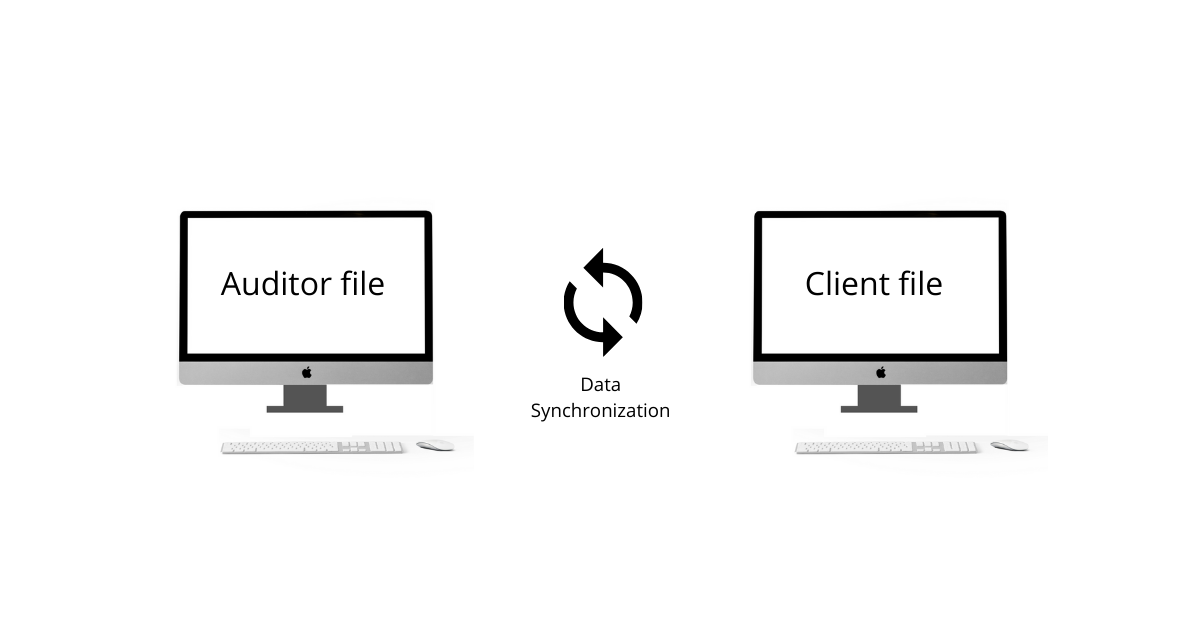
Hello, in this post, we will see Data Synchronization between Client and Auditor file or between Peer files in Saral Accounts and billing software.
Before starting the process, make sure that:
• Both the systems have Saral Accounts/Saral Billing is installed and is of the same version.
• In Client-Auditor synchronization, as the client will be sharing the details, Auditor needs to create a file with the same GSTIN and other basic company details.
Let us now see the process one-by-one:
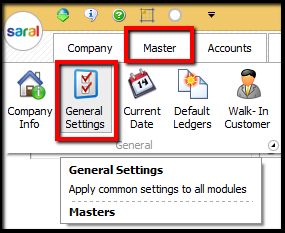
The configuration for Client and Auditor file or Peer files starts with registering the file for Data Exchange. To register for Data Exchange, go to General Settings under Master Module.
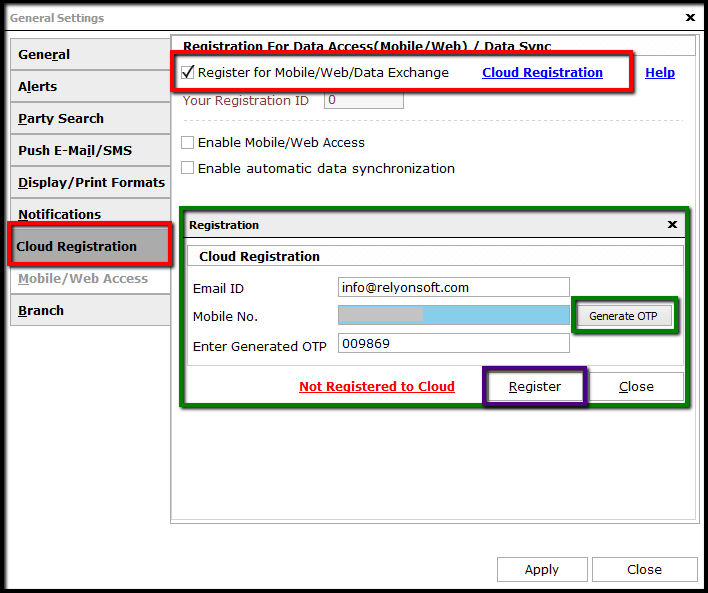
In the General Settings screen, select Cloud Registration tab and enable the option Register for Mobile/Web/Data Exchange. Next, click on Cloud Registration hyperlink. In the registration window, provide the mail id and mobile number used for registration and click on Generate OTP. The OTP will be received on the mail id and mobile number entered. Enter the OTP and click on Register.
You will be registered for Data Exchange and your Registration id will be displayed. Next, enable the option to Enable automatic Data Synchronization and the Data Synchronization window will be displayed.
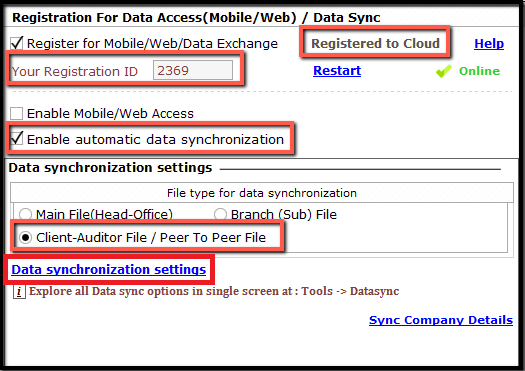
Note: The same settings are to be done in both the files.
Select the type of file i.e. Client-Auditor File/ Peer To Peer File and click on Data Synchronization Settings hyperlink.
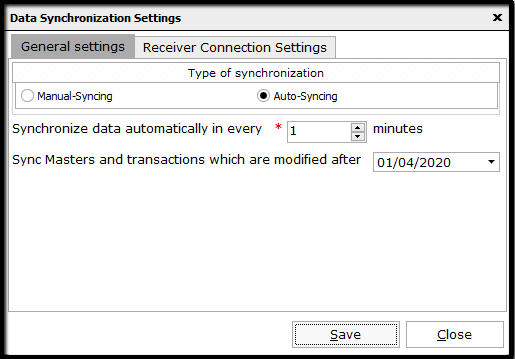
In the Data Synchronization window, select the required type of synchronization i.e. Manual-Syncing if the data will be synced manually and Auto-Syncing for an automated process.
In the case of Auto-Syncing, select the duration for sync i.e. 1 if the data has to be synced every 1 minute. Also, if the data has to be synced after a particular date, then enter the date and save the settings.
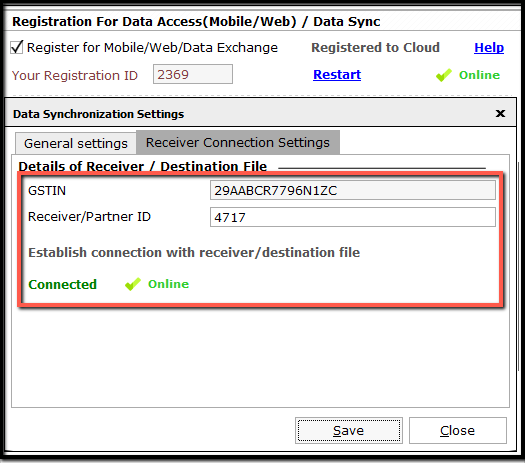
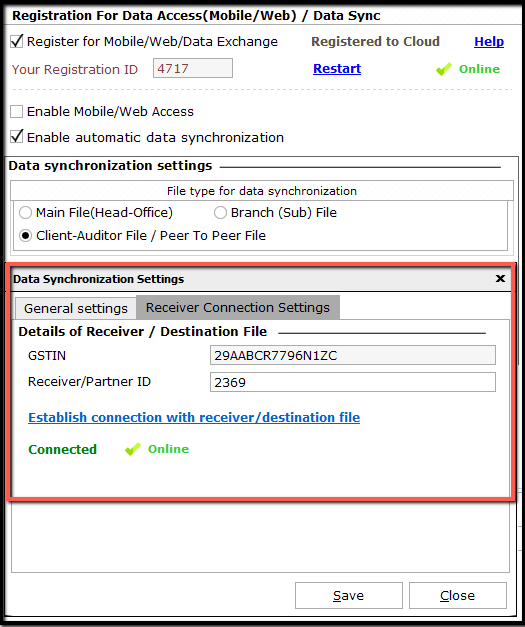
In Receiver Connection Settings, the GSTIN will be auto taken from the company details. Enter the Receiver/Partner ID i.e. the Registration Id for Cloud Registration in the file to which data has to be synced.
After entering the details, click on Establish connection with receiver/destination file. This will connect the file to the peer file or Client/Auditor and the status will be shown as Connected. If the other file is currently available then it will be displayed as Online. Save and continue.
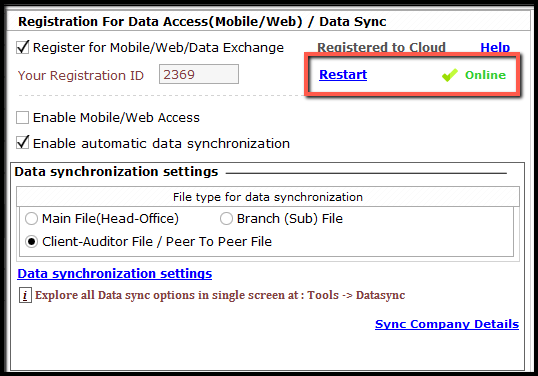
On successful synchronization, you can see that the status is shown as Online. In case the sync is not successful, click on Restart.
Now, click on Apply and all the settings done will be made applicable for the company file.
Similarly, the other file also has to be registered and configured for data synchronization.
After the configuration, we will see the process of data sync between the files.
Go to Data Sync option under Tools and the Data Synchronization dashboard will be displayed.
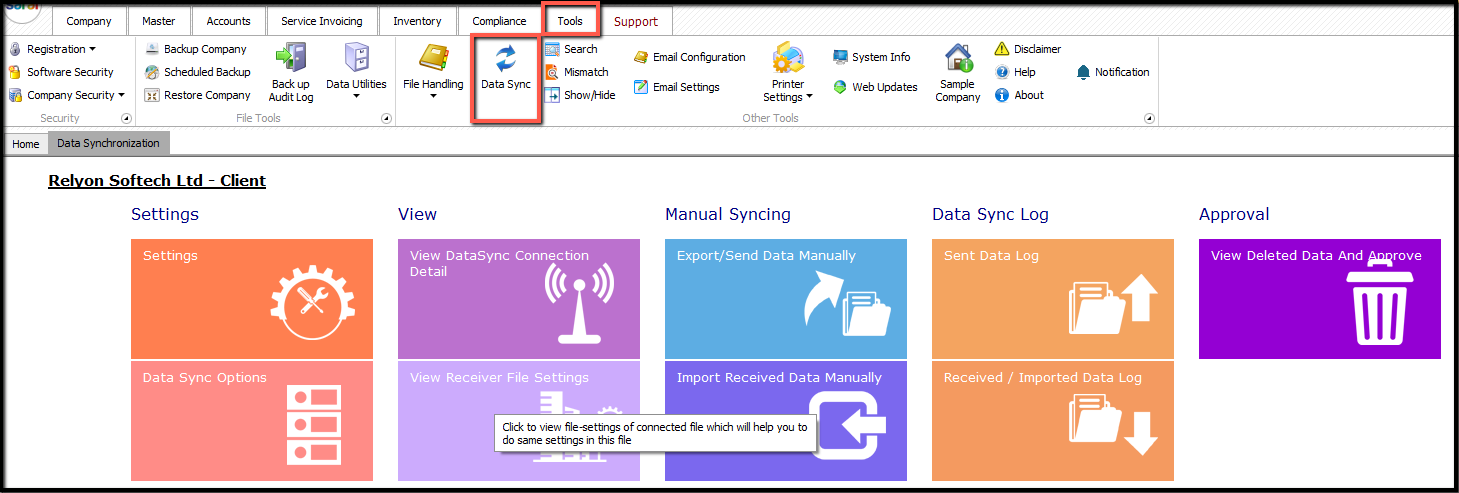
Click on Data Sync Options to view details of data that is synchronized between the files. If the data is not synchronized, click on Sync Data and all the data will be synchronized.
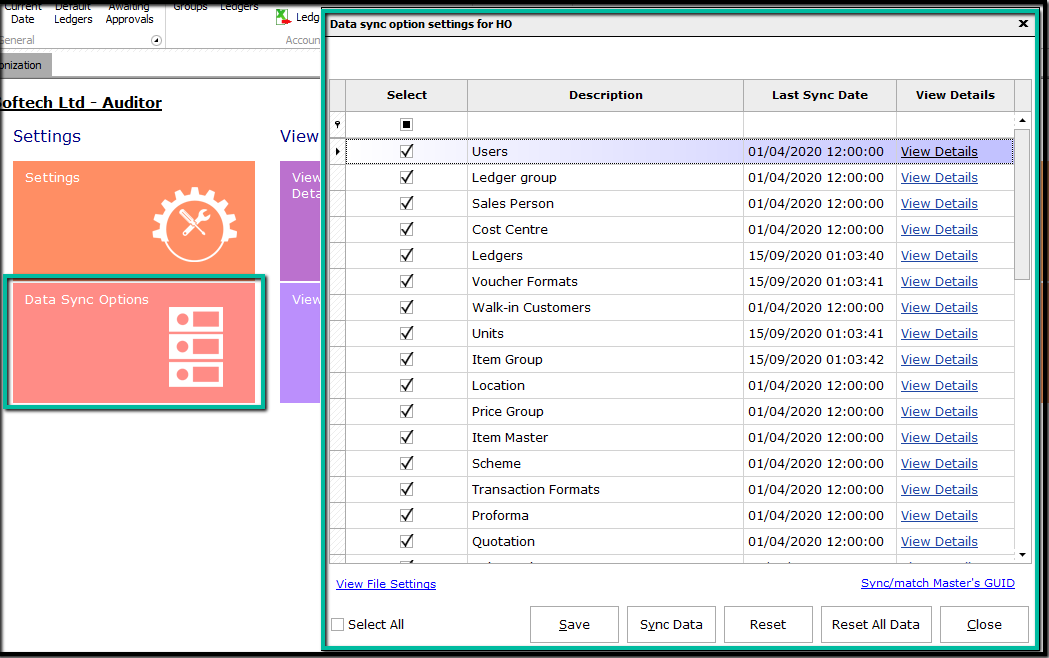
Note: If an option that is required to be synchronized is not enabled, then enable the option and save.
To view the details of data exported, click on Sent Data Log and the list of data exported will be displayed with time stamp and other details.
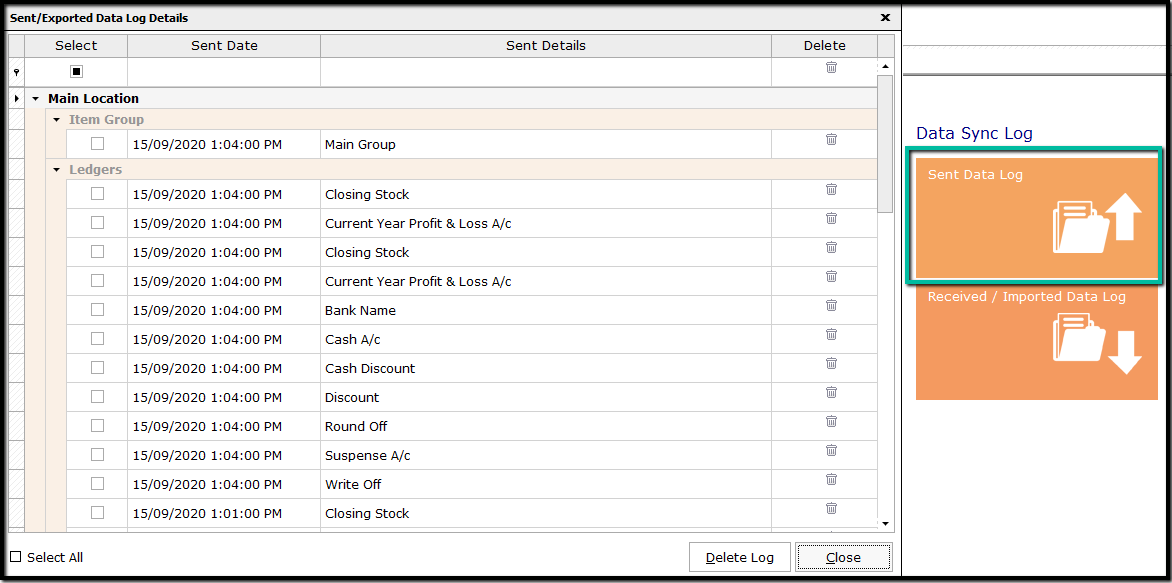
To view the details information of data synchronized, click on View details. The data successfully send as well data in case of any failed transaction; will be listed under Imported Successfully and Failed To Import, respectively.
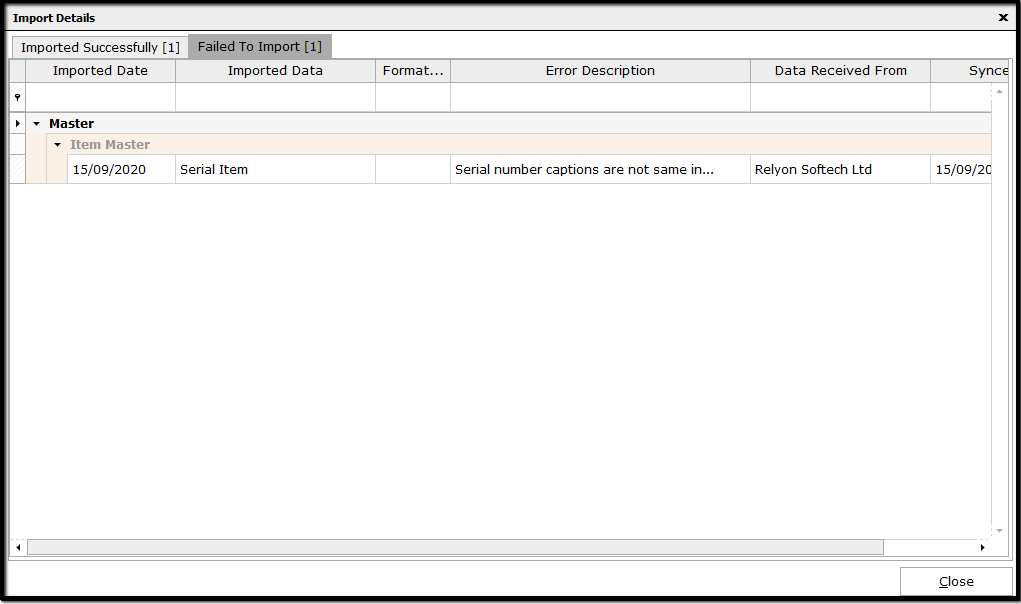
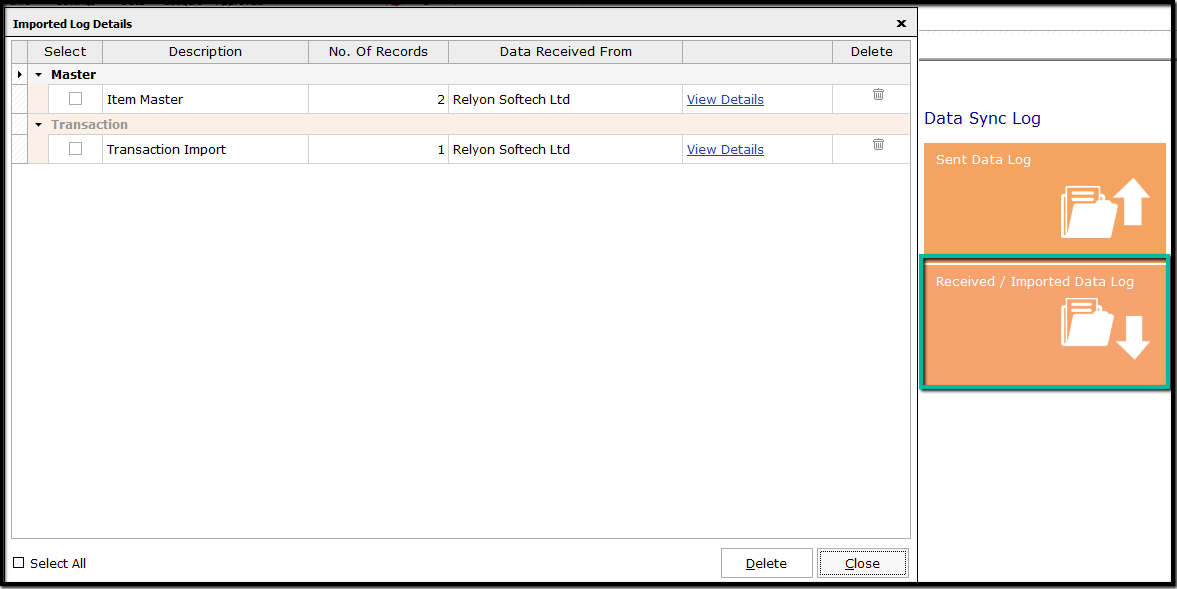
Similarly, to view the details of data imported, click on Received/ Imported Data Log and the list of data imported will be displayed with time stamp and other details
If any data is deleted in the connecting file, then the information on such data deleted will be indicated at View Deleted Data and Approve.
The user needs to approve such deletion. The details will be grouped based on the type. If the full group is to be deleted, then click on Delete.
If the data is not approved for deletion, then click on Clear Log and Re-sync which will sync back the deleted data to the files.
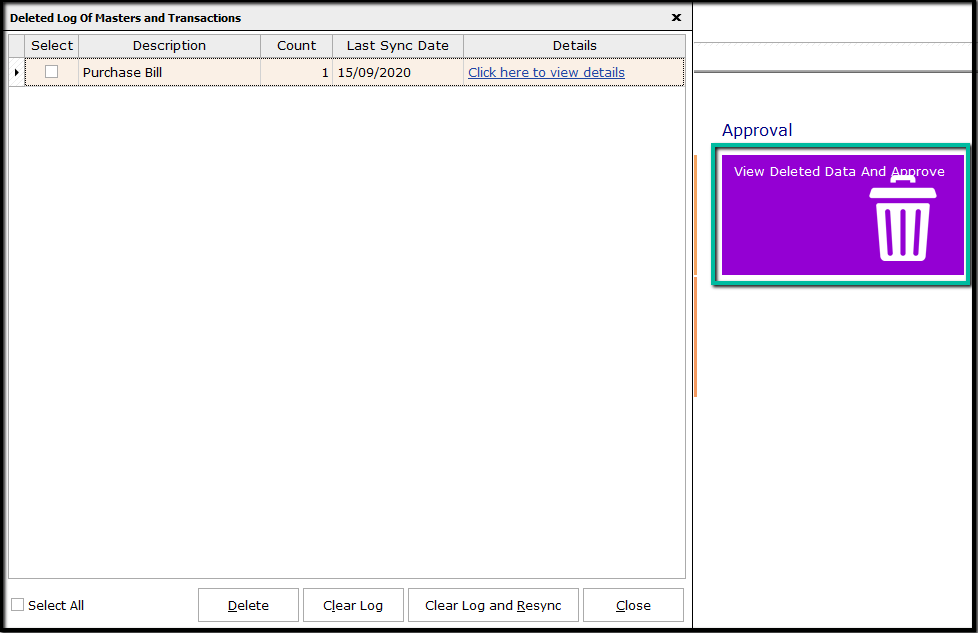
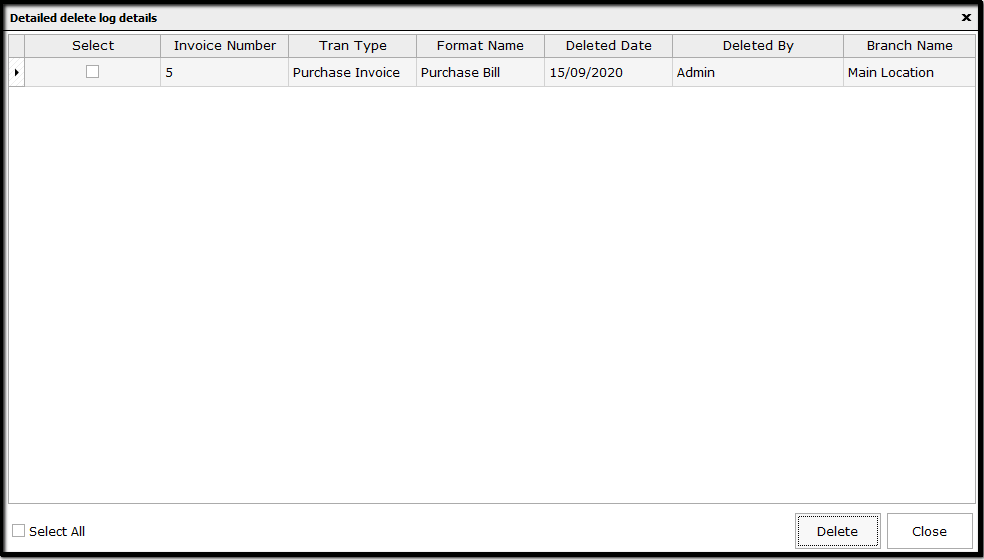
If any individual transaction is only to be deleted, then click on Click here to view details. In the window, select the required transaction and click on Delete.
This completes the process of Data Synchronization between Client and Auditor file or between Peer files in Saral Accounts and Billing software.


