Hi, this post is the continuation of AMC and Warranty in Saral Accounts software.
In the last post, we had seen the basic settings of AMC/Warranty i.e. the general settings and Gadget menus. It can be view here – https://www.saralaccounts.com/tutorials/amc-and-warranty-in-saral/
In this post, we shall continue and see the workflow of the Warranty. This shall include the process of generating Warranty for the sales invoice and registering a post-sales service call.
STEP I – Generation of Warranty
After saving the Sales invoice, the Warranty window will be displayed were the required warranty period details have to be updated.
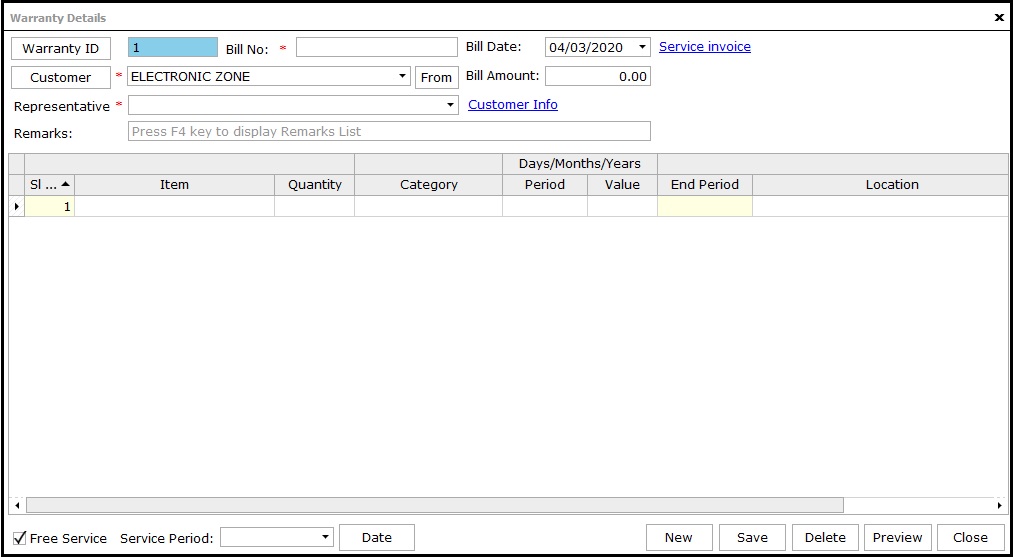
Note: Warranty will be effective through sales invoices only.
The customer ledger will be auto-selected in the window. Click From to refer to which specific invoice no. the warranty belongs to. This update should be done by the user only.
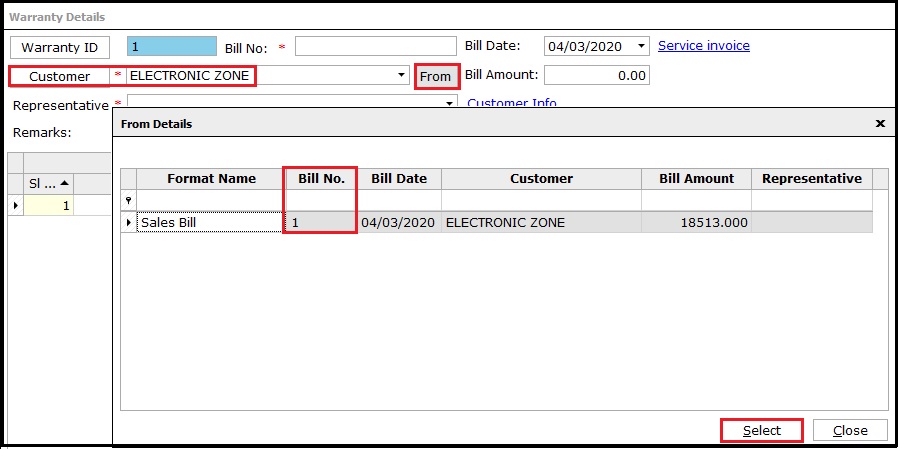
Note: Do not update warranty details manually as it is a good practice to refer bill no’s using “From” button.
Select the sales representative and update the required warranty details.
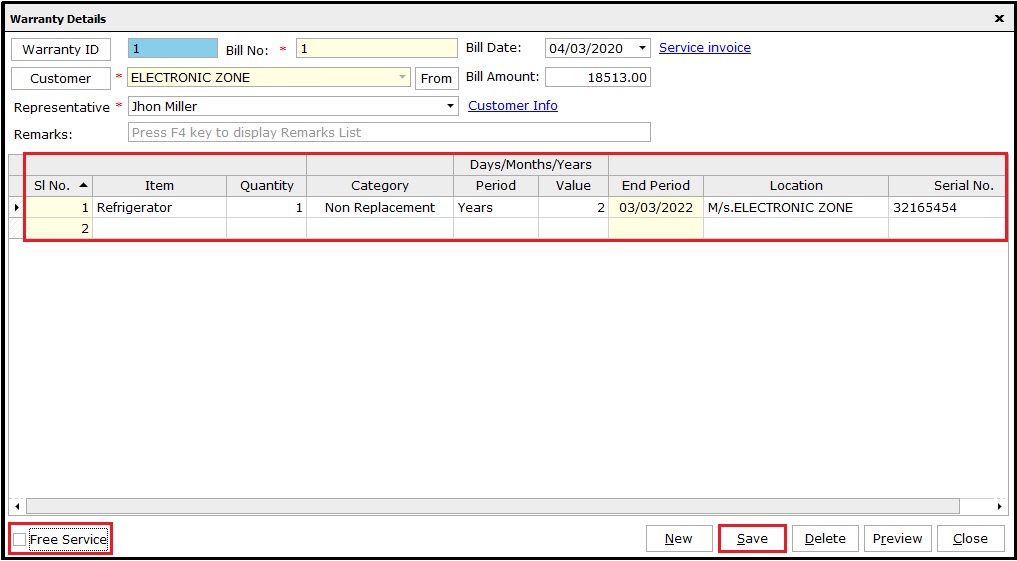
- Remarks: Type required remarks or press F4 for earlier appropriate remarks to be selected.
- Category: To select a replacement or non-replacement type of warranty for the goods.
- Period/Value: Provide specific warranty period with value as in Days/Months/Years and end period will be auto-calculated.
- Free Service: Applicable, if opted for services during the AMC period. Not applicable for warranty.
Click Save to completing the Warranty.
Note: Users can also update Warranty details after-sales invoice at a later time. For the same, follow the below steps.
Go to Warranty/AMC module and click Warranty from AMC Gadget tab.
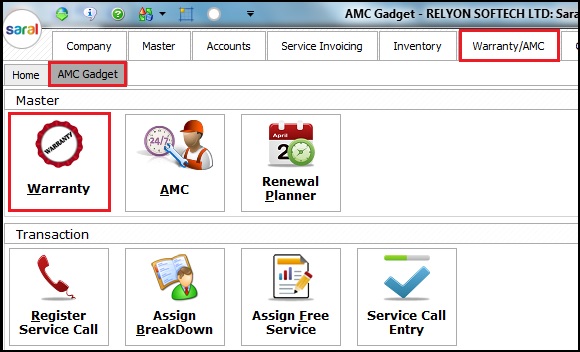
Here, update the warranty details as explained above.
STEP II – Registering Service Call
During the Warranty period, if the customer calls for help/support on facing issue with the purchased product, then such call needs to be registered.
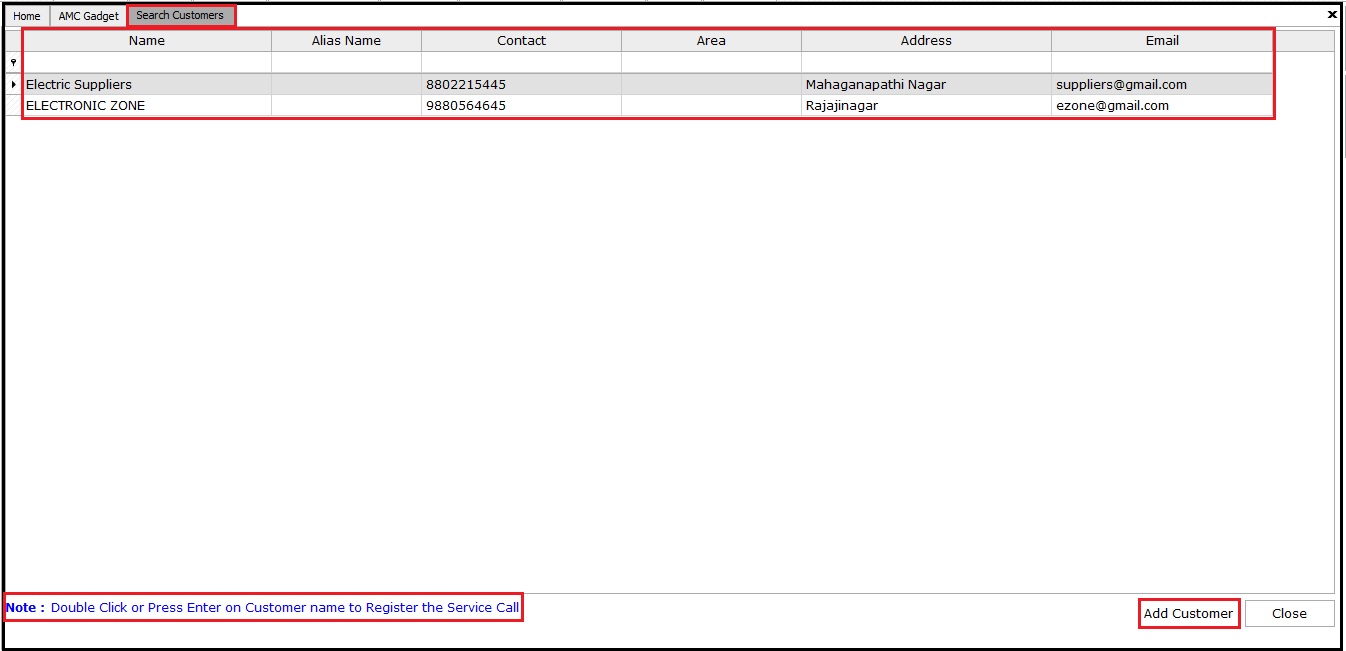
To do this, click Warranty/AMC module under Transaction, click Register Service Call from AMC Gadget tab.
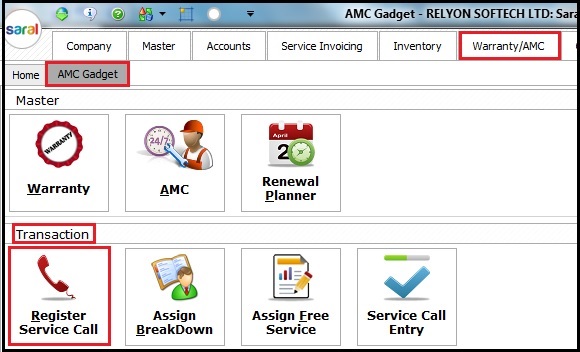
In Search Customers window, double click on customer ledger to get Register Service Call window.
Note:
- Contact/Address/E-mail: details will appear when on user captured in customer’s ledger details.
- Add customer: Opt to add customer ledger directly.
Please refer below Register Service Call window for updating details on the issue faced by the customer.
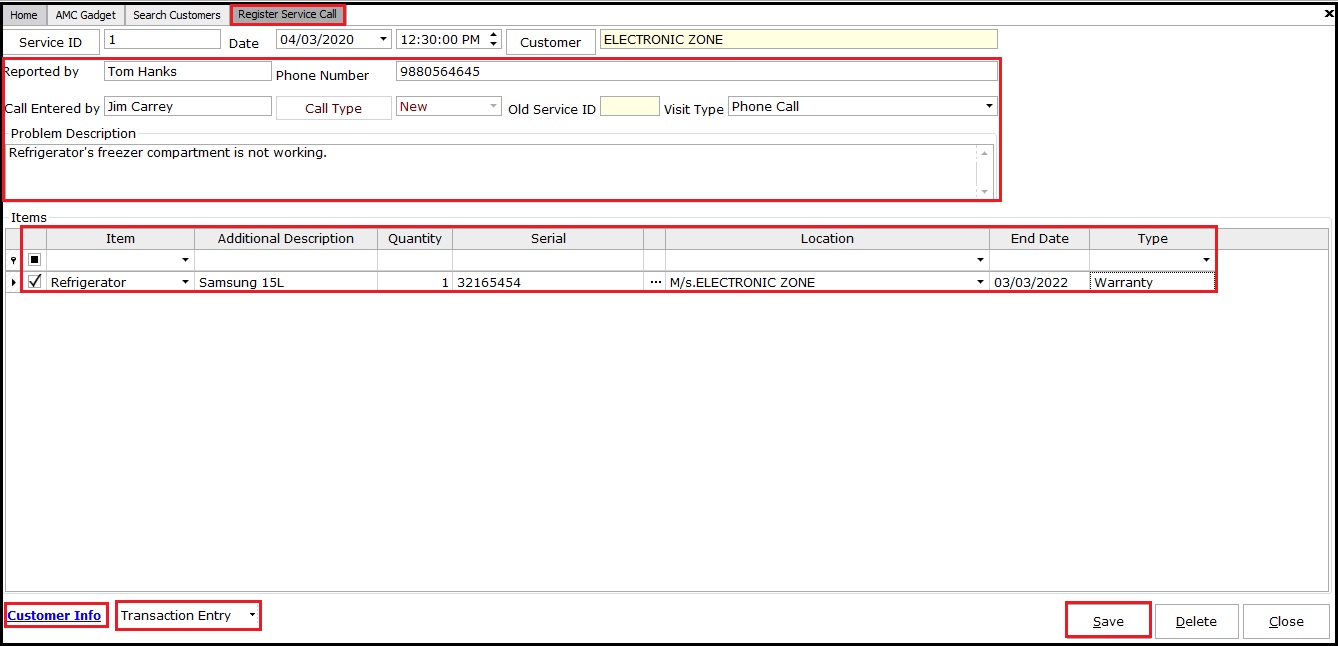
- Reported by:- Enter the name of the executive, who has reported the issue
- Call Entered by:- Enter the name of the executive, who received the call from the customer.
- Call Type:- Select the call type as per customer aspects.
- New:- If the customer has called for the first time to customer care for asking support or customer call with a different issue.
- Re-open:- Repeated customer call for the same issue.
- Old Service ID:- ID will be shown automatically whenever the case is reopened on repeated issues.
- Visit Type:- Enter on which communication medium the customer is reporting the issue. i.e. Phone call/E-mail/Chat/On-site/if any.
- Problem Description:- Write issue in detail that is reported as per the customer or press F4 to select the previous issue from the list.
- Additional Description:- If required, add an additional note on the warranty.
- Warranty End Date/Type:- The support should be as per the warranty period end date and its type i.e. AMC/Warranty/Out of warranty.
Note:
- Support will be applicable to the customer if the warranty exists and will not be applicable if the warranty period has expired.
- Warranty types are auto-populated as per customer ledger and their sales invoice.
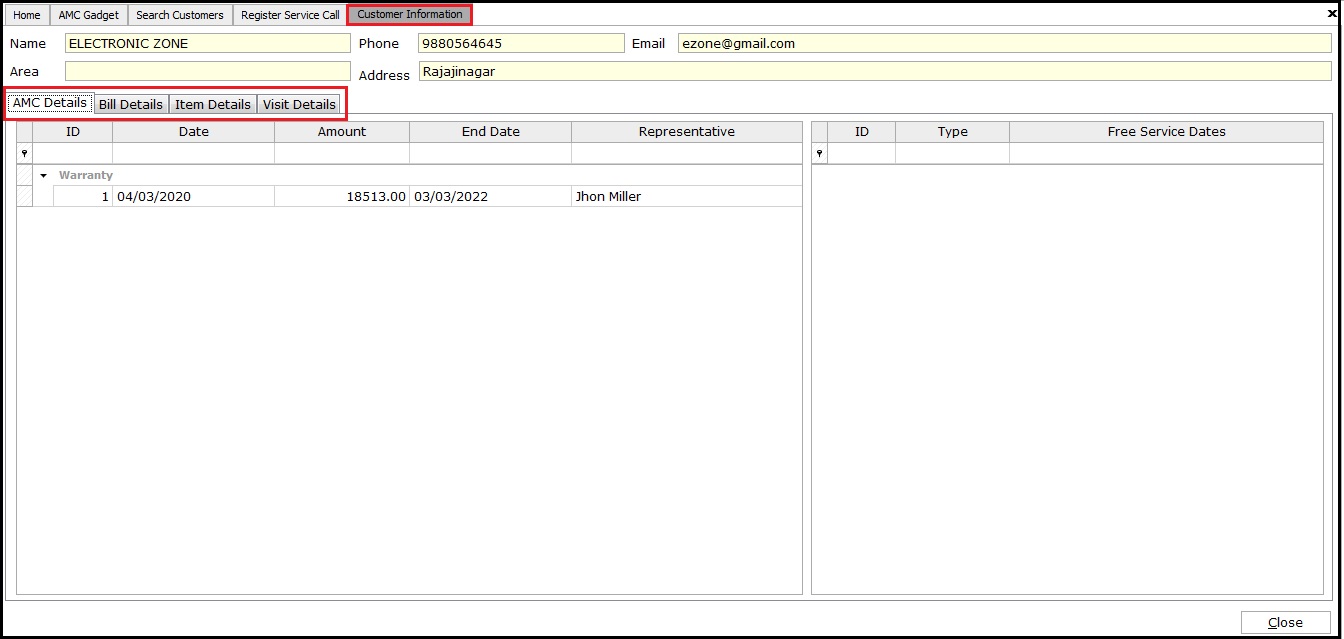
Customer info: Click to find out customer wise overall details on Warranty period, i.e. how many sales invoices were made, which items were purchased, number of times on-site support is given by Service engineer.
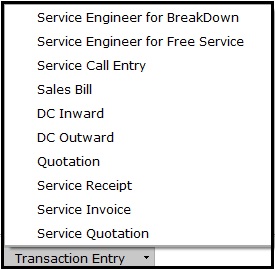
Transaction Entry: Click to make direct entries on different types of transaction.
Click on Save to complete the service call registration.
This completes part 2 of AMC and warranty in Saral.


