Welcome. This is a post in which we will be discussing about multi branch management in Saral software.
We will cover the following topics:
- Concept of multi-branches in business
- Capabilities of Multi Branch Management in Saral
- How it works in Saral
Concept of Branch office in Business
A Branch office is a location, other than Main office, where business is conducted on behalf of Head Office. Branch office is open, when it’s difficult to manage the market at a geographically faraway place from Main Office.
Branch offices act like supporting pillars of business to effectively connect with the local market and reduce the travelling cost between the market and Main Office. This also helps to cover the remote market.
Capabilities of Multi Branch Management in Saral
- Automatic data synchronization between Main office and Branch office with only internet and without any manual intervention.
- Data will be stored in local systems, Main and Branch offices respectively.
- We can operate Saral in all locations even if internet is offline.
- Branch office can access their respective branch data only, with user security.
- Main office can access complete data of all branch offices.
- Report can be generated as consolidated report with all the branch details or an individual Branch wise report
- Single GSTIN can be managed for all local branch offices and state wise GSTIN for Branch offices across states, to file GST Returns.
- Automated Branch stock transfer option through which DC Outward is raised in stock sending branch and an alert to accept it as DC Inward is received in stock receiving branch
- Automated branch to branch sales and purchase option where Sales Invoice when raised at the selling branch, an alert to accept the Sales Invoice as Purchase Invoice is received at the purchasing branch.
How it works in Saral
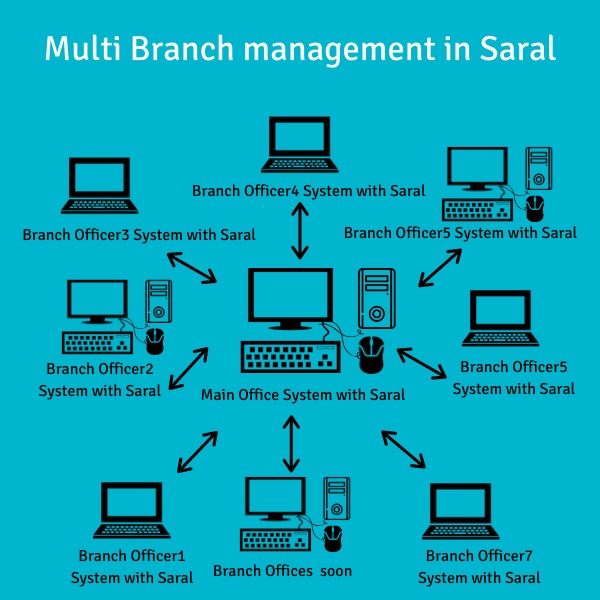
Multi Branch Management in Saral Billing / Accounts is used to synchronize the data between Main Office and Branch Offices situated at different locations.
Before data synchronization between Main office and Branch offices, ensure that;
- Company is created in Saral with all branch office details in Main office server.
- Branch Companies created in Saral at all Branch office systems.
- Data synchronization setting is done in both Main office server and all Branch office systems.
Once the data synchronization setting is done, the real time data synchronization process can take place through when Main office and Branch office systems are connected through the internet. If the internet goes offline, then data will be stored in the local system and will be synchronized when the internet is back online.

Configuring Branch office Data Synchronization
Note:
1. Must enable user logins
2. Internet should be online while 1st time configuration
Settings to be done in Head office system:
- Create a Head office company with the GSTIN.
- Go to Masterà General SettingsàClick on Cloud Registration tabà enable Register for Mobile/Web/Data Exchangeàclick on Registered to Cloud.
- Enter the Email ID and Mobile Number–>Click on Generate OTP, an OTP will be sent to the given Mobile Number
- Enter the Generated OTP and click on Register Buttonàafter registration, click on Close.
- Then click on Enable Automatic Data Synchronization and select Main File(Head-Office) option and then click on Apply and Close.
- Again Go to Masterà General Settingsà click on Branch TabàSelect Main File (Head Office) > Enable Branch -> click on Create Branches.
- Enter the Branch Code, Branch Name and Address and other details of the branch.
- Select the Head Office GSTIN from the drop-down list, if branch is also dealing with same GSTN or Press F9 shortcut key and create new GSTN and Save the branch and Close.
- Then click on Apply.
- Then follow the steps in Settings to be done in Branch office system.
- Once Branch system settings are done then again go to Masterà General Settingsà click on Branch tab.
- Then select respective branch in the below list to connect with the branch system.
- Then click on Connect to Branch option to get the status Online.
- Once its connected then we can check the data sync settings by clicking on Data Sync Option Settings option and click on Save and Close then Apply and Close.
- Now we have completed with Branch data synchronization configuration and data will be sync automatically.
- Please refer ToolsàData Sync option for further status check.
Settings to be done in Branch office system:
- Repeat the above mentioned Head Office settings steps from 1 to 4.
- Then click on Enable Automatic Data Synchronization and select Branch (Sub) File optionà enter Data Configuration Name which is entered in Head Office file refer above step 6 then copy Branch Name and enter here and click on Apply. Then click on Sync Company Details option and click on Apply.
- Then click on Data Synchronization Settings link and select Auto-Syncing option.
- Then enter 1 minute for Synchronization Data Automatically in Every and enter date to start synchronize from a cut of date if branch office data file data is already exist.
- Then click on Receiver Connection Settings tab and enter Head Office GSTIN and Data Configuration Name which is entered in then click on Save.
- And then click on Establish connection with receiver/destination file option then will get the status connected. Then click on Save and Close then Apply.
- Then go to Head Office system and follow the steps from 11.
This completes our post on multi branch management in Saral. We hope you found this useful.

