Hello, in this post, we will see Branch creation for Multi Branch Management in Saral Accounts and billing software.
Multi-Branch Management is required when the business has multi branches at various locations and the details of all the branches have to be managed at a single system.
Let us now see the process step-by-step:
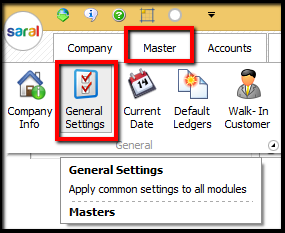
To create branch/branches, go to General Settings under Master Module.
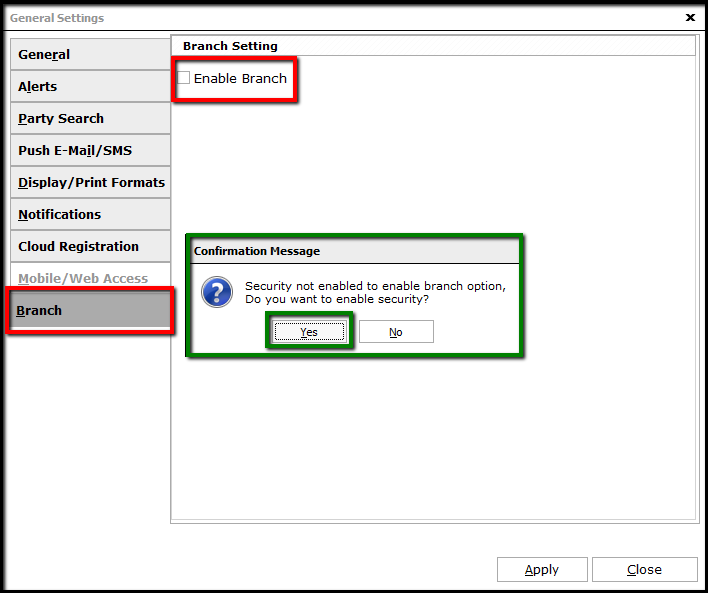
In the General Settings screen, select Branch tab and enable the option Enable Branch. If the Security for the file is not enabled, it is mandatory to enable the same before creating Branch. Click Yes to enable Security.
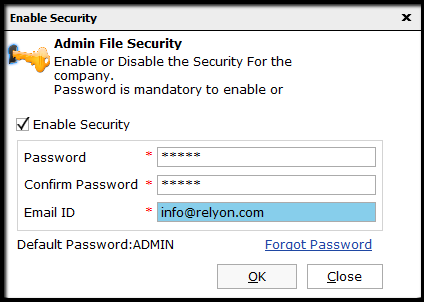
Provide the default password with Mail ID for recovery and continue.
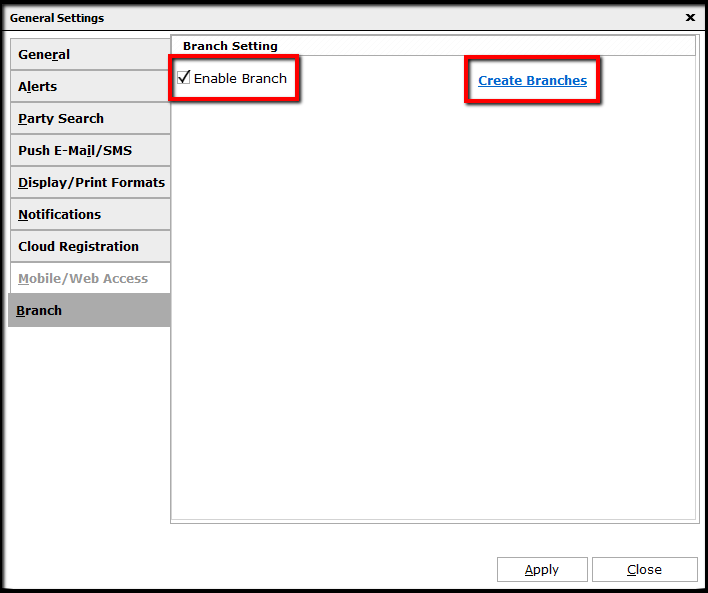
The Branch option will be enabled. Click on Create Branches hyperlink to continue with branch creation.
The Branch Master window will be displayed. Start creating the required branches by providing the branch details.
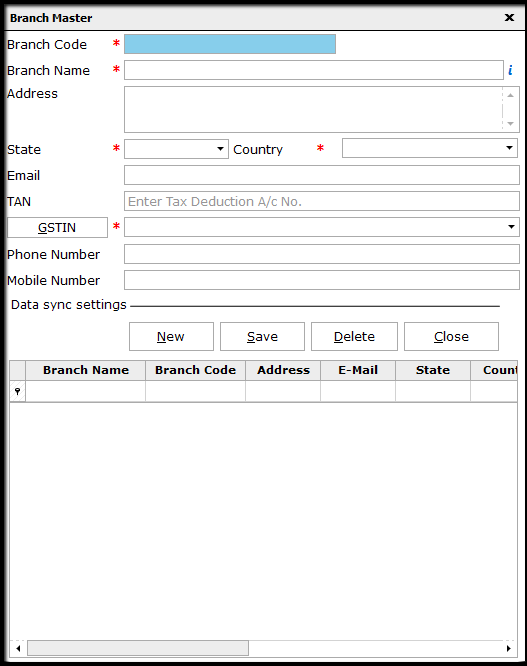
Note: All fields with Red Asterisk are mandatory fields.
The details to be provided are:
- Branch Code: An identifier code for the branch
- Branch Name: Name of the branch as per accounting records
- Address: Address of the branch
- State/Country: Branch Location, state and country
- Email: Contact mail id of Branch
- TAN: TAN for the branch.
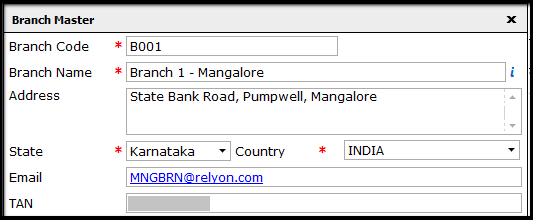
- GSTIN: By default, the GSTIN of the main office will be listed. If any other GSTIN is available, then add them in the GSTIN master by clicking on GSTIN Button and then select the applicable GSTIN.
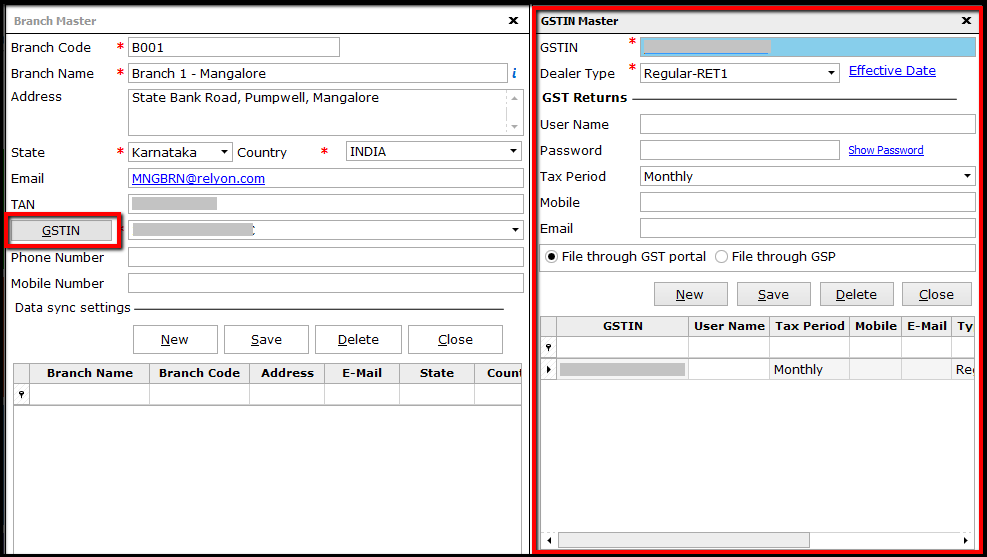
- GSTIN Master: Here, enter all the GSTIN information for the branches like Dealer type, Login credentials for GSTN portal, Return Periodicity, Contact information for the GSTIN and mode of return upload.
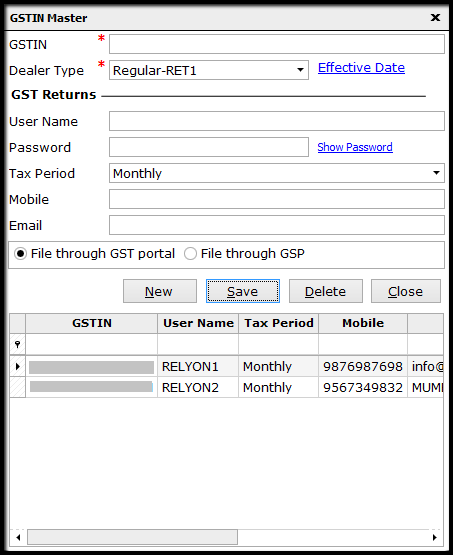
Note: HO GSTIN information will be available by default. This can be updated if required.
- Phone/Mobile Number: Contact details of the branch.
On providing all the details of the branch, save the details and the branch will be created for further process. Likewise, create all the branches of the business.
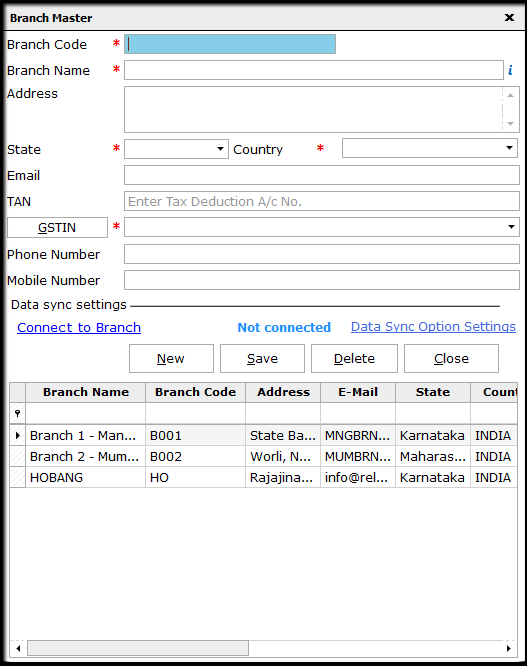
Note: Head office will be created as a Branch, by default. Hence, the details need not be entered again. The related details of HO can be updated here.
This completes the process of Branch creation in Saral.


